Mastering Best Coffee Brewing Methods At Home For Perfect Flavor Every Time
Table of Contents
- Importance of Selecting the Right Brewing Method for Flavor Extraction and User Preference
- Step-by-Step French Press Brewing Method
- Pour-Over Brewing Method: Equipment, Technique, and Extraction Science
- AeroPress Brewing Method: Techniques, Extraction, and Customization
- Cold Brew Brewing Process: Grind Size, Ratios, and Steeping for Optimal Flavor
- Hot vs. Cold Brewing: Temperature Effects on Acidity, Sweetness, and Body
- Step-by-Step Cold Brew Guide: From Steeping to Serving
- Chemical Differences in Cold Brew Extraction: Reduced Acidity and Enhanced Sweetness
- Comprehensive Guide to Brewing Espresso at Home
- Moka Pot Brewing Process and Technique
- Siphon Brewing (Vacuum Pot Brewing) Process and Science
- Nitro Cold Brew: Homemade Infusion with Nitrogen for Creamy, Stout-Like Coffee
- Emerging and Niche Home Coffee Brewing Methods
- Essential Brewing Tools for Home Coffee Preparation and Their Impact on Consistency and Flavor
- Ideal Water Parameters for Home Coffee Brewing and Adjustment Methods
Crafting the ideal cup of coffee at home transforms a simple ritual into an art form, where method, precision, and ingredient quality converge to unlock flavors ranging from bright citrus notes to deep chocolatey richness. From the bold, oily body of a French Press to the crisp clarity of a pour-over, each brewing technique offers a distinct pathway to extraction, catering to preferences shaped by time constraints, budget, or taste profiles. What began as centuries-old traditions—like the stovetop Moka Pot or the Japanese pour-over—has evolved into a modern playground of innovation, where tools like the AeroPress and siphon vacuum pots push the boundaries of home brewing. Whether you’re a novice seeking simplicity or a connoisseur chasing nuance, understanding these methods demystifies the process, turning variables like grind size, water temperature, and extraction time into levers you can control to achieve consistency. This guide dissects the science, techniques, and trade-offs behind the best home brewing methods, equipping you with the knowledge to elevate every brew from mundane to extraordinary.
The journey starts with recognizing that no single method is universally "best"—the right choice depends on your priorities. A French Press delivers a full-bodied, aromatic cup in minutes with minimal equipment, while a pour-over like the Hario V60 reveals the intricate layers of a single-origin bean through precision and patience. Cold brew, with its smooth, low-acid profile, is ideal for those who crave sweetness and complexity without bitterness, whereas espresso machines demand investment in both machinery and skill to master. Even unconventional techniques, like the nitrogen-infused nitro cold brew or the visually stunning siphon brew, offer unique textures and flavors that redefine what home coffee can be. By exploring these methods, you’ll not only refine your palate but also gain control over the variables that shape your daily caffeine fix—from the mineral notes in your water to the roast level of your beans.
Importance of Selecting the Right Brewing Method for Flavor Extraction and User Preference
The choice of coffee brewing method directly influences the final cup’s flavor, aroma, and body, making it a critical factor for both home baristas and casual drinkers. Each technique extracts different compounds from coffee grounds—such as acids, oils, and sugars—at varying rates, resulting in distinct taste profiles. User preference further refines this selection, as factors like convenience, equipment cost, and brewing time play a role in long-term adherence to a method. Understanding these dynamics ensures a tailored coffee experience that aligns with sensory expectations and practical lifestyle needs. Flavor extraction is governed by three primary variables: **contact time** (how long water interacts with coffee), **temperature** (typically 90–96°C for optimal extraction), and **agitation** (stirring or pressure to release solubles). For example, immersion methods like the French Press emphasize full-bodied, oily flavors due to prolonged steeping, while pour-over techniques prioritize clarity and brightness by controlling water flow. User preference intersects with these variables—those seeking boldness may favor pressure-based methods (e.g., Espresso), while minimalists might opt for simplicity (e.g., Drip Coffee). The interplay between extraction science and personal taste ensures no single method dominates universally.Flavor Profiles and Extraction Science
The chemical composition of coffee changes under different brewing conditions, leading to distinct flavor outcomes. Key compounds include: - **Chlorogenic acids**: Contribute to tartness and complexity; over-extraction yields bitterness. - **Sugars**: Provide sweetness and body; under-extraction leaves them underdeveloped. - **Oils**: Add richness and mouthfeel; often retained in immersion methods. - **Volatile compounds**: Responsible for aroma; preserved in slower, lower-temperature brews. A study published in *Food Chemistry* (2018) demonstrated that pour-over methods (e.g., V60) produce cups with higher clarity and acidity due to shorter contact times, while immersion brewing (e.g., French Press) enhances body and oil retention. The **S Ratio** (a metric for extraction balance) further quantifies this: an ideal ratio of 1.5–2.5 (soluble solids to dry coffee) yields balanced flavor. Methods like the **AeroPress** achieve this through controlled pressure, while **Cold Brew** relies on extended steeping (12–24 hours) to mellow acids and emphasize sweetness.User Preference and Practical Considerations
Beyond flavor, brewing methods must align with daily routines and budget constraints. For instance: - **Time constraints**: Espresso machines require significant upfront investment and skill, while single-serve pods (e.g., K-Cup) offer instant convenience. - **Equipment cost**: A manual pour-over setup (e.g., Hario V60 + gooseneck kettle) costs ~$30, whereas a French Press starts at ~$20, but espresso machines exceed $500. - **Maintenance**: Methods like the **Chemex** demand precise measurements and paper filters, while the **Moka Pot** involves boiling water and requires descaling. A 2022 survey by the *Specialty Coffee Association* revealed that **pour-over** and **French Press** were the most popular home methods among enthusiasts, citing their balance of flavor control and ease. Conversely, **Cold Brew** gained traction for its low-acid profile, appealing to those with sensitive stomachs. The decision often hinges on a trade-off between **flavor precision** and **practicality**, with no universal "best" method—only the one that fits individual priorities. ---
Step-by-Step French Press Brewing Method
The French Press, or plunger pot, is one of the simplest yet most effective immersion brewing methods for extracting rich, full-bodied coffee flavors. Its design allows coffee grounds to steep directly in hot water, preserving oils and fine particles that contribute to a robust cup. Proper technique—including grind size, water temperature, and steeping time—directly influences extraction balance, clarity, and body. Below is a detailed guide to achieving consistent results. ---Preparation and Equipment
A French Press requires minimal equipment but demands precision in execution. Key components include: - A **32–40 oz (1–1.2 L) glass or stainless steel French Press** (size adjusts yield; smaller carafes improve heat retention). - **Medium-coarse grind coffee** (resembling sea salt or wet sand; finer grinds risk over-extraction and sludge). - **Freshly filtered water** (180–200 ppm TDS, ideally 205°F/96°C; avoid tap water with high mineral content). - **Scale** (0.1g precision for accuracy) and **thermometer** (optional but recommended for temperature control). - **Timer** (4-minute steeping is standard, but adjustments may be needed).**Grind Size Matters:** A French Press tolerates a wider grind range than other methods, but **medium-coarse** is optimal. Finer grinds increase surface area, accelerating extraction and producing a bitter, muddy cup. Coarser grinds yield a clean but under-extracted brew.---
Step-by-Step Brewing Process
**1. Boil and Measure Water** - Heat water to **205°F (96°C)** (just off boil; boiling water can scald coffee, extracting harsh compounds). - Measure **40g of coffee per 500ml (16oz) of water** (adjust ratio for taste preference; 1:15 is standard). **2. Grind Coffee** - Grind beans **immediately before brewing** to preserve aromatics. Aim for a **medium-coarse consistency**—when pinched, grounds should feel slightly gritty but not powdery. **3. Bloom (Optional but Recommended)** - Add coffee to the press and pour **just enough water to saturate the grounds** (e.g., 20–30g water for 40g coffee). - Stir gently and let sit for **30–45 seconds**. This releases trapped CO₂, ensuring even extraction. **4. Pour Remaining Water** - Slowly pour the rest of the water in a **spiral motion**, avoiding clumping. Stir gently once more to ensure uniform saturation. - Place the lid on the press (do not press yet) and let steep for **4 minutes** (adjust based on strength preference). **5. Press and Serve** - After steeping, **press the plunger down slowly and steadily** (avoid jerking, which can create turbulence and over-extract fines). - Pour immediately to prevent further extraction. Serve in pre-warmed mugs to retain heat and aromatics. ---Pros and Cons of French Press Brewing
**Advantages:** - **Full-Bodied Flavor and Body:** Immersion brewing retains **oils and suspended solids**, contributing to a rich mouthfeel and complex flavor profile. - **Simplicity:** No paper filters or complex equipment; ideal for beginners. - **Versatility:** Works well with **dark roasts, espresso blends, and single-origin beans** due to its forgiving extraction window. - **Cost-Effective:** One-time purchase with no consumable filters. **Disadvantages:** - **Sediment and Sludge:** Lack of filtration leaves **fine particles** in the cup, which some find unappealing. - **Over-Extraction Risk:** Prolonged steeping or fine grinds can lead to **bitterness and astringency**. - **Cleanup Effort:** Requires manual removal of grounds and carafe washing (though some models have dishwasher-safe components). - **Heat Loss:** Glass carafes lose heat faster than insulated methods, requiring precise temperature control.**Flavor Profile Insight:** French Press excels with **medium to dark roasts** due to their natural sweetness and lower acidity. Lighter roasts may taste **harsh or sour** if over-extracted, as their delicate compounds are more susceptible to bitterness.---
Comparison of Immersion Brewing Methods
Below is a comparative table highlighting key differences between French Press, AeroPress, and Cold Brew—three popular immersion methods—based on extraction time, flavor intensity, and cleanup effort.| Metric | French Press | AeroPress | Cold Brew |
|---|---|---|---|
| Extraction Time | 4–5 minutes (hot immersion) | 1–2 minutes (hot, pressure-assisted) | 12–24 hours (cold, slow diffusion) |
| Flavor Intensity | Bold, oily, full-bodied; retains fines and body | Clean, bright, and adaptable (adjustable pressure); less sediment | Smooth, low-acid, sweet; emphasizes natural sugars |
| Cleanup Effort | Moderate (manual grounds removal, carafe washing) | Low (disposable filters available; minimal residue) | High (requires filtration if serving without sediment; large batches) |
| Grind Size Requirement | Medium-coarse (sea salt texture) | Fine to medium (espresso-like for stronger brew) | Coarse (gravel-like; prevents over-extraction during long steep) |
| Best For | Dark roasts, espresso blends, bold flavor profiles | Single-origin beans, travel brewing, quick preparation | Low-acid coffee, iced coffee, smooth sipping |
Troubleshooting Common French Press Issues
Improper technique often leads to **over-extraction, under-extraction, or sediment** in the final cup. Below are solutions to address these issues: **1. Over-Extraction (Bitter, Harsh, or Burnt Taste)** - **Cause:** Fine grind size, prolonged steeping, or water too hot. - **Solutions:** - Use a **coarser grind** (adjust grinder settings or switch methods). - Reduce steeping time to **3–3.5 minutes**. - Lower water temperature to **195–200°F (90–93°C)**. - Rinse the carafe with cold water after pressing to **shock and halt extraction**. **2. Under-Extraction (Weak, Sour, or Watery Taste)** - **Cause:** Coarse grind, short steeping, or insufficient agitation. - **Solutions:** - Use a **finer medium-coarse grind** (closer to wet sand). - Extend steeping to **4.5–5 minutes**. - Stir more vigorously during pouring to **break up clumps**. - Increase coffee-to-water ratio (e.g., 1:14 instead of 1:15). **3. Excessive Sediment (Muddy or Gritty Cup)** - **Cause:** Fine grind, aggressive stirring, or prolonged pressing. - **Solutions:** - Use a **coarser grind** to reduce particle size in the brew. - Press **slowly and gently** to minimize turbulence. - Pour coffee into a **fine-mesh sieve** before serving to filter out large particles. - Consider a **double French Press technique**: Brew in a smaller press, then decant into a larger one for a cleaner cup. **4. Uneven Extraction (Patchy or Ashy Taste)** - **Cause:** Inconsistent water distribution or clumping. - **Solutions:** - **Bloom the coffee** before pouring the rest of the water. - Stir **gently but thoroughly** after pouring to ensure even saturation. - Use a **scale** to measure water precisely for consistent ratios. ---Chemical and Physical Processes in Immersion Brewing
Immersion brewing relies on **soluble extraction**, where water dissolves compounds from coffee grounds through **diffusion and convection**. Key processes include: **1. Solubility and Extraction Dynamics** - Coffee contains **~1,000+ soluble compounds**, including: - **Acids** (chlorogenic, citric, acetic) contributing to brightness and tartness. - **Sugars** (fructose, sucrose) adding sweetness and body. - **Oils** (triglycerides, cafestol) imparting richness and mouthfeel. - **Alkaloids** (caffeine, theobromine) affecting bitterness and stimulation. - **Water temperature** (195–205°F/90–96°C) optimizes extraction by balancing solubility: - Below **190°F (88°C)**, extraction is **too slow** (under-extracted, sour). - Above **210°F (99°C)**, extraction accelerates, risking **bitterness and astringency**. **2. Diffusion and Turbulence** - **Diffusion:** Water molecules penetrate coffee grounds, dissolving solubles via **osmosis-like transfer**. - **Convection:** Stirring or agitation creates **micro-turbulence**, ensuring even contact between water and grounds. Without stirring, **channels form**, leading to uneven extraction (e.g., some grounds over-extracted, others under-extracted). - **Pressure Effects:** Unlike pour-over, immersion lacks forced pressure, relying on **gravity and time** to drive extraction. The French Press’s **plunger applies minimal pressure**, but most extraction occurs during steeping. **3. Oil Retention and Emulsion** - French Press uniquely preserves **coffee oils** (typically filtered out in paper methods), which: - Enhance **mouthfeel and body** (e.g., crema-like texture). - Contribute to **aromatic complexity** (oils carry volatile compounds). - **Downside:** Oils can **degrade over time**, leading to **rancid or stale flavors** if coffee sits too long after brewing. **4. Steeping Time and Extraction Curves** - Extraction follows a **non-linear curve**: - **0–1 minute:** Rapid dissolution of **sugars and acids** (bright,Pour-Over Brewing Method: Equipment, Technique, and Extraction Science
The pour-over method is one of the most precise and customizable ways to brew coffee at home, offering control over extraction variables to highlight nuanced flavors. Unlike immersion brewing, pour-over relies on gravity and manual pouring to extract coffee solubles, making technique and consistency critical. This method is favored by specialty coffee enthusiasts for its ability to produce clean, bright, and aromatic cups when executed correctly. The choice of equipment, grind size, brew ratio, and pour technique directly influence the final cup’s clarity, acidity, and body. Below are the foundational elements for mastering pour-over brewing, including recommended tools, step-by-step timing, and the science behind extraction. ---Recommended Pour-Over Equipment and Its Characteristics
Pour-over setups vary in filter material (paper vs. metal), cone shape, and flow rate, each affecting extraction dynamics. The three most popular devices—**Hario V60, Chemex, and Kalita Wave**—differ in design and ideal use cases.*"The ideal pour-over setup balances water flow rate, turbulence, and contact time to avoid over-extraction or under-extraction."*- **Hario V60 (V-Drip)** - **Design**: Narrow, conical shape with a spiral ridge to guide water flow. - **Filter**: Standard paper filters (e.g., V60 01 or 02) or metal mesh (for cleaner, oilier cups). - **Best for**: Highlighting single-origin coffees with intricate floral or fruity notes. - **Flow rate**: Faster than Chemex, requiring finer grinds to slow extraction. - **Brew ratio**: Typically **1:15 to 1:17** (e.g., 20g coffee to 300g water). - **Chemex** - **Design**: Wide-mouthed, thick-walled glass carafe with a bonded filter. - **Filter**: Thicker paper filters (e.g., Chemex 185 or 350) that remove more fines, producing ultra-clean cups. - **Best for**: Full-bodied, low-acidity coffees with tea-like clarity. - **Flow rate**: Slower due to filter thickness, allowing longer contact time. - **Brew ratio**: Often **1:16 to 1:18** (e.g., 30g coffee to 500g water). - **Kalita Wave** - **Design**: Flat-bottomed with a unique "wave" pattern to distribute water evenly. - **Filter**: Paper filters (compatible with V60 02 or Kalita-specific filters). - **Best for**: Balanced extraction with minimal channeling, ideal for espresso-like clarity. - **Flow rate**: Moderate, between V60 and Chemex. - **Brew ratio**: **1:15 to 1:16** (e.g., 25g coffee to 375g water). **Additional Equipment**: - **Gooseneck kettle**: Essential for precision pouring (e.g., Fellow Stagg, Hario Kengo). - **Scale**: Digital (0.1g precision) for accurate measurements. - **Timer**: Stopwatch or smart scale with timer function. - **Grinder**: Burr grinder (e.g., Baratza Sette, Eureka Mignon) for consistent particle size. ---
Key Variables in Pour-Over Brewing: Grind Size, Brew Ratio, and Water Technique
The interplay between grind size, brew ratio, and pour technique determines extraction efficiency. Misalignment in these variables leads to sourness (under-extraction) or bitterness (over-extraction).*"Grind size is the most critical lever in pour-over: too coarse yields weak, watery coffee; too fine results in muddy, over-extracted brew."*- **Grind Size Guidelines** - **V60**: Medium-fine (similar to table salt). - **Chemex**: Medium (slightly coarser than V60 to compensate for slower flow). - **Kalita Wave**: Medium-fine (between V60 and Chemex). - **Adjustment rule**: If coffee is sour, grind finer; if bitter, grind coarser. - **Brew Ratio** - Standard ranges from **1:14 to 1:18** (coffee-to-water). - **Weaker ratios (1:18+)** emphasize clarity and acidity (e.g., Ethiopian Yirgacheffe). - **Stronger ratios (1:14)** increase body and sweetness (e.g., Brazilian Santos). - **Water Temperature** - **Ideal**: 90–96°C (195–205°F). - **Too hot (>96°C)**: Extracts bitter compounds prematurely. - **Too cold (<90°C)**: Under-extracts, yielding flat flavors. - **Pour Technique** - **Bloom phase**: Initial pour (2x coffee weight in water) to saturate grounds and release CO₂. - **Main pour**: Gradual, spiral motion to avoid channeling. - **Final rinse**: Top-off with remaining water to maintain even extraction. ---
Step-by-Step Pour-Over Timeline (3–4 Minute Brew)
A well-timed pour-over follows a structured sequence to maximize extraction efficiency. Below is a **3:45-minute protocol** for a 20g coffee / 300g water brew (1:15 ratio) using a V60.*"The goal is to maintain a steady extraction rate, avoiding sudden spikes in drawdown speed."*| **Time (sec)** | **Action** | **Purpose** | |----------------|---------------------------------------------------------------------------|-----------------------------------------------------------------------------| | 0:00–0:15 | Place filter in drippers; rinse with hot water (discard rinse). | Preheats vessel, removes paper taste, and saturates filter. | | 0:15–0:30 | Add 20g coffee; start timer. Pour **40g water** (2x coffee weight) in a spiral. | Creates a **bloom** to release CO₂ and even wet all grounds. | | 0:30–0:45 | Wait 30–45 sec for bloom. | Allows CO₂ to escape, preventing over-extraction. | | 0:45–1:30 | Pour remaining **260g water** in **4 stages** (65g each), spiraling outward. | Gradual saturation avoids channeling; each pour should take ~20 sec. | | 1:30–2:15 | Pause at **~150g poured** to agitate the bed by gently stirring with a spoon. | Breaks up clumps, ensuring even extraction. | | 2:15–3:00 | Continue pouring final **105g water** in slow, concentric circles. | Maintains gentle agitation; aim for a **steady drawdown** (1 drop/sec). | | 3:00–3:45 | Let brew finish naturally; total yield should be **~280–300g**. | Avoids over-extraction; stop when drips slow to ~1 drop every 2–3 sec. | **Critical Notes**: - **Agitation**: Stirring at **~75% extraction** (1:30 mark) prevents dry clumps and ensures uniform contact. - **Drawdown speed**: Ideal rate is **1 drop/sec** during the main pour. Adjust grind or pour speed if faster/slower. - **Total brew time**: 3:45 is a guideline; aim for **~90% extraction** (measured by yield vs. water used). ---
Flavor Profiles: Paper Filters vs. Metal Filters in Pour-Over
Filter material significantly alters the final cup’s clarity, body, and mouthfeel due to differences in particle retention and oil filtration.*"Paper filters remove nearly all coffee oils and fines, while metal filters allow oils to pass through, yielding a heavier body."*| **Filter Type** | **Clarity** | **Acidity** | **Body** | **Oils/Fines** | **Best For** | |-----------------|---------------------------|---------------------------|------------------------|--------------------------|---------------------------------------| | **Paper (V60/Chemex)** | Ultra-clean, tea-like | Bright, pronounced | Light to medium | Minimal (0.5–1%) | Floral, fruity, or delicate coffees. | | **Metal (V60 mesh)** | Slightly cloudy | Muted, rounded | Full, syrupy | High (5–10%) | Bold, chocolatey, or nutty profiles. | **Key Differences**: - **Paper filters** emphasize **clarity and acidity** by trapping oils and fines, ideal for high-grown coffees (e.g., Kenyan AA). - **Metal filters** (e.g., stainless steel mesh) allow **more oils and body** through, mimicking espresso-like mouthfeel but with less brightness. - **Thicker paper (Chemex)**: Further reduces fines, producing a **softer, more mellow** cup compared to thin V60 paper. ---
Science of Pour-Over Extraction: Water Flow Rate and Contact Time
Extraction in pour-over is governed by **solubility kinetics**, where water dissolves coffee compounds at varying rates. The **extraction curve** (a graph of extraction percentage over time) reveals how flavors develop and degrade.*"Optimal extraction occurs when water contacts coffee grounds for **30–60 seconds total**, with a **peak extraction rate** around 20–40% yield."***Key Principles**: 1. **Solubility Hierarchy**: - **Fast**: Sugars, acids (e.g., citric, malic) extract first (0–30% yield). - **Moderate**: Body compounds (e.g., lipids, amino acids) peak at **40–60%**. - **Slow**: Bitter compounds (e.g., chlorogenic acids) dominate **>70% extraction**. 2. **Water Flow Rate**: - **Too fast**: Under-extracts (sour, weak). - **Too slow**: Over-extracts (bitter, astringent). - **Ideal**: **1–2 drops/sec** during main pour, with **gradual acceleration** as the bed compacts. 3. **Contact Time**: - **Bloom phase (0–0.5 min)**: CO₂ release reduces extraction rate, preventing over-acidity. - **Main extraction (0.5–3 min)**: Water dissolves soluble solids; agitation ensures uniformity. - **Drawdown (3–4 min)**: Final rinse maintains even extraction without over-pulling. **Extraction Curve Visualization (Text-Based)**: ``` Extraction % (Y-axis) ^ | /\
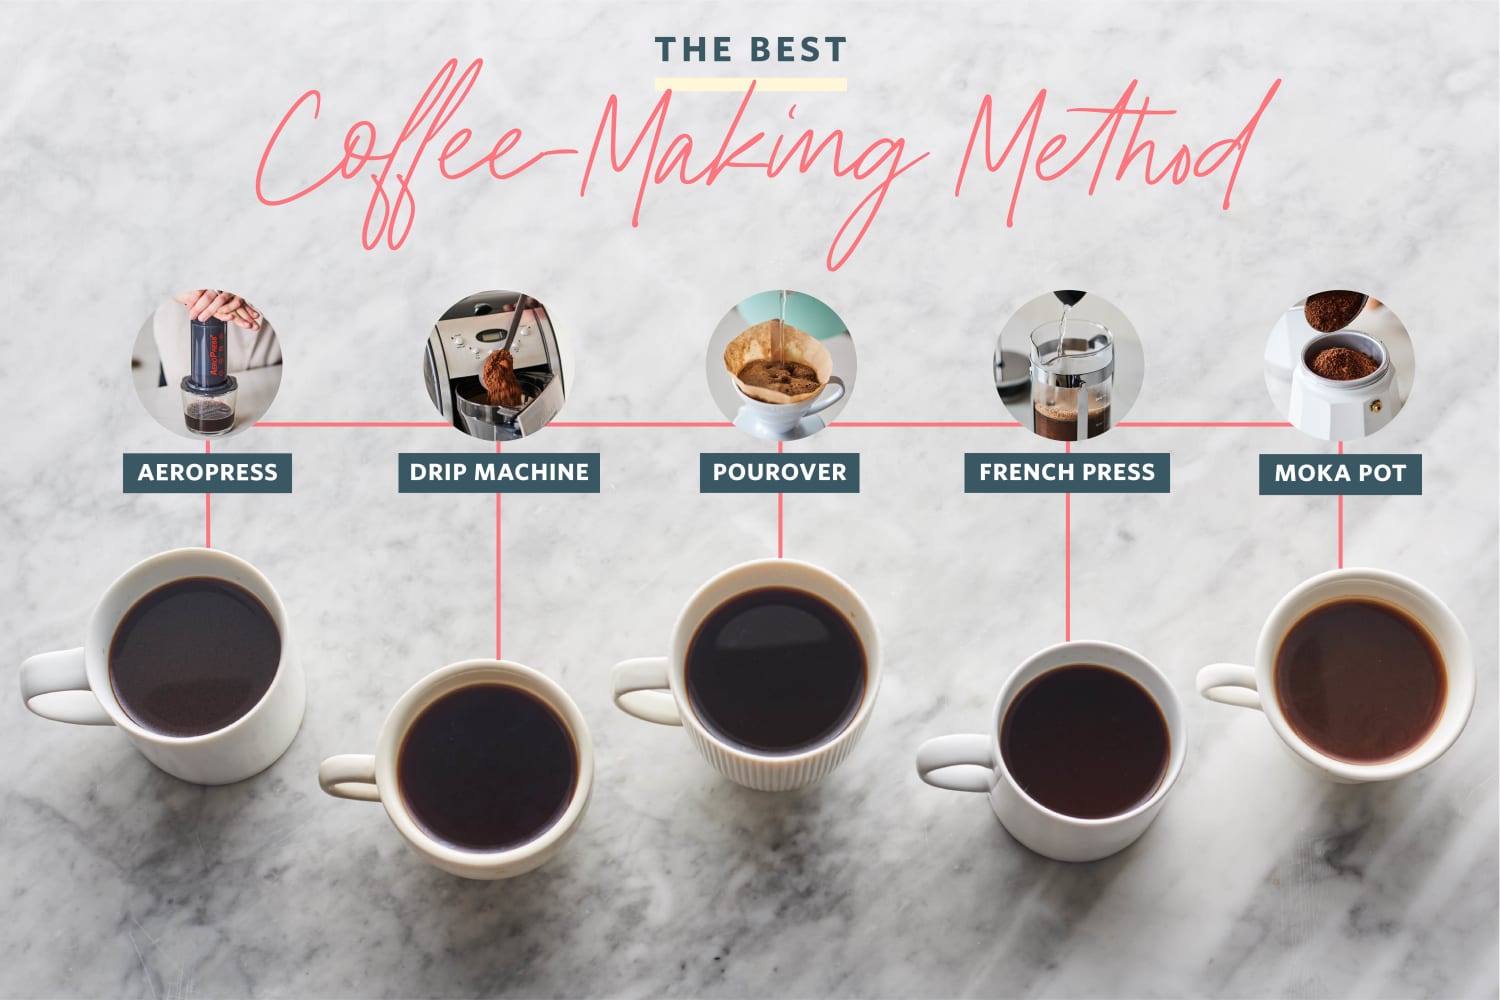
AeroPress Brewing Method: Techniques, Extraction, and Customization
The AeroPress is a versatile, manual coffee brewer that leverages air pressure to extract flavor from ground coffee in under a minute. Its design allows for flexibility in brewing techniques, with two primary methods—the **standard (upside-down) brew** and the **inverted (bottom-up) brew**—each producing distinct flavor profiles. The method’s portability, ease of use, and ability to adapt to various coffee styles make it a favorite among home brewers and travelers alike. Understanding its mechanics, including pressure dynamics and agitation, enables precise control over extraction, particularly for different roast levels. The AeroPress operates by drawing hot water through a coffee puck under pressure, creating a concentrated yet smooth cup. Unlike immersion brewers (e.g., French Press) or pour-over methods, the AeroPress’s rapid extraction minimizes over-extraction, reducing bitterness while preserving clarity and sweetness. Its stainless steel or plastic chamber, combined with a paper filter, produces a clean cup with minimal sediment. The choice between inverted and standard brewing alters the extraction process, influencing body, acidity, and mouthfeel. ---Standard vs. Inverted Brewing Techniques
The orientation of the AeroPress during brewing significantly impacts extraction dynamics and flavor outcomes. **Standard (Upside-Down) Brew** - **Process**: Water is added to the inverted chamber (filter side down), coffee is added, and the plunger is pressed downward after agitation. - **Extraction Characteristics**: - **Faster extraction**: Pressure builds quickly, reducing brew time to 30–60 seconds. - **Lighter body**: Less contact time with coffee grounds results in a cleaner, more tea-like profile. - **Higher acidity**: Ideal for light to medium roasts, emphasizing floral, fruity, or citrus notes. - **Lower solubility**: Less coffee dissolves in water, yielding a brighter but less full-bodied cup. - **Best For**: Pour-over enthusiasts transitioning to AeroPress, those preferring a lighter, more nuanced cup, or brewing single-origin coffees with delicate flavors. **Inverted (Bottom-Up) Brew** - **Process**: The chamber is placed filter-side up, water is added first, then coffee, and the plunger is pressed upward after agitation. - **Extraction Characteristics**: - **Slower extraction**: Water percolates through the puck gradually, increasing brew time to 60–90 seconds. - **Fuller body**: Extended contact time enhances oil and soluble extraction, producing a richer, more syrupy cup. - **Reduced acidity**: Suited for medium to dark roasts, where caramelized and chocolatey notes dominate. - **Higher solubility**: More coffee compounds dissolve, resulting in a bolder, more espresso-like intensity. - **Best For**: Those seeking a stronger, milk-friendly cup or experimenting with espresso-like concentrations. ---Pressure and Agitation in Extraction
The AeroPress’s unique extraction mechanism relies on **controlled pressure (9 bars at full press)** and **agitation (stirring or shaking)** to optimize flavor balance. Pressure accelerates extraction, while agitation ensures even saturation of coffee grounds, preventing channeling (where water bypasses grounds). **Role of Pressure** - **Rapid extraction**: The 9-bar pressure (equivalent to ~1.5 atmospheres) forces water through the puck in seconds, reducing brew time while maintaining clarity. - **Solubility trade-off**: Higher pressure increases extraction of bitter compounds (e.g., cafestol) but also enhances sweetness and complexity if brew time is controlled. - **Filter efficiency**: The paper filter blocks most oils and fine particles, resulting in a cleaner cup compared to immersion methods. **Role of Agitation** - **Stirring**: Breaks up coffee clumps, ensuring even water distribution and preventing dry or over-extracted spots. - **Shaking (optional)**: Agitates the slurry further, improving homogeneity and reducing sediment in the final cup. - **Timing**: Agitation should occur **after** water and coffee are combined but **before** pressing to maximize surface area contact. **Adjusting for Roast Levels** Different roast levels require tailored extraction parameters to avoid under- or over-extraction. | **Roast Level** | **Recommended Technique** | **Water Temperature** | **Brew Time** | **Agitation Method** | **Pressure Control** | |-----------------|---------------------------------|------------------------|---------------|----------------------------|-------------------------------| | Light | Inverted (bottom-up) | 195–205°F (90–96°C) | 60–90 sec | Gentle stir (30 sec) | Full press (9 bars) | | Medium | Standard (upside-down) | 200–205°F (93–96°C) | 45–60 sec | Vigorous stir (45 sec) | Moderate press (7–9 bars) | | Dark | Standard with pre-infusion | 205–210°F (96–99°C) | 30–45 sec | Stir + 10-sec shake | Full press (9 bars) | **Key Adjustments**: - **Light roasts**: Use inverted brewing to prolong extraction and highlight bright, acidic notes. Avoid over-agitation, which can extract tannins and bitterness. - **Medium roasts**: Standard brewing with moderate agitation balances sweetness and body. Pre-wetting the filter (rinse method) reduces paper taste. - **Dark roasts**: Standard brewing with pre-infusion (adding water, stirring, then pressing) enhances oil extraction for a fuller mouthfeel. Higher agitation can intensify smoky or chocolatey flavors. ---Comparison of AeroPress to Other Portable Brewing Methods
The AeroPress excels in portability, customization, and speed, but other methods offer distinct advantages depending on user priorities. Below is a comparative analysis of portable brewing systems based on key metrics.| Metric | AeroPress | Travel Mug (e.g., Toddy, Stanley) | Single-Serve Pods (e.g., Nespresso, Keurig) | Pour-Over (e.g., Kalita Wave, Hario V60) |
|---|---|---|---|---|
| Brew Time | 30–90 sec (standard/inverted) | 3–5 min (steeped, no agitation) | 1–2 min (automated) | 2–4 min (manual pour) |
| Portability | Compact, lightweight (150g), fits in most bags | Bulky, requires separate brewer (e.g., French Press) | Pods are portable, but machine is not | Moderate (dripper + mug + tools) |
| Customization | High (ratio, grind, time, pressure, technique) | Low (limited to steep time and grind) | Very low (pre-set pods, no control) | High (pour rate, grind, water temp) |
| Cup Clarity | Clear (paper filter removes fines) | Cloudy (no filter, sediment remains) | Clear (built-in filter) | Clear (paper filter) |
| Flavor Profile | Balanced, clean, adaptable to roast | Muted, often under-extracted | Consistent but limited by pod quality | Bright, nuanced, roast-dependent |
| Equipment Cost | $30–$50 (basic kit) | $10–$30 (mug) + $20–$50 (brewer) | $50–$150 (machine + pods) | $15–$40 (dripper + tools) |
| Maintenance | Low (rinsing filter, occasional cleaning) | Moderate (cleaning grounds from mug) | Moderate (descaling, pod waste) | Low (filter changes, dripper care) |
| Best For | Travelers, espresso-like shots, customization | Minimalists, camping, no-frills brewing | Convenience, consistency, office use | Precision, clarity, home barista experience |
Troubleshooting Common AeroPress Issues
Despite its simplicity, the AeroPress can encounter issues related to extraction, clogging, or bitterness. Addressing these systematically ensures consistent results. **1. Clogging or Slow Pressing** - **Causes**: - Overly fine grind (espresso-like consistency). - Wet paper filter blocking flow. - Coffee puck too dense (under-agitation or stale coffee). - **Solutions**: - **Grind adjustment**: Use a medium-fine grind (similar to table salt). Avoid pre-ground coffee. - **Filter prep**: Rinse the paper filter with hot water before use to remove papery taste and pre-wet it. - **Agitation**: Stir vigorously for 10–15 seconds to break up clumps. For inverted brewing, shake the chamber gently. - **Pressure technique**: Apply even, steady pressure. Avoid jerking the plunger, which can create air gaps. **2. Uneven Extraction (Channeling)** - **Causes**: - Uneven coffee distribution in the chamber. - Insufficient agitation leading to dry spots. - Water temperature too low (under 195°F/90°C). - **Solutions**: - **Distribute grounds**: Add coffee to the chamber, then tapCold Brew Brewing Process: Grind Size, Ratios, and Steeping for Optimal Flavor
Cold brew stands out among coffee brewing methods for its smooth, low-acidity profile and rich, syrupy body. The process relies on steeping coarse coffee grounds in cold water for an extended period, extracting flavors slowly without the bitterness associated with hot water extraction. Ideal for those seeking a mellow, dessert-like coffee experience, cold brew requires precise control over grind size, coffee-to-water ratio, and steeping time to maximize flavor while minimizing over-extraction. The coarse grind size—comparable to sea salt—is critical to prevent sludge formation and ensure a clean, smooth texture. A finer grind would lead to over-extraction and bitterness, while an overly coarse grind would under-extract, resulting in a weak or sour cup. Steeping for 12–24 hours allows for gradual extraction of soluble compounds, including chlorogenic acids, which contribute to the coffee’s body and sweetness. The longer steeping time also reduces acidity, making cold brew particularly appealing for those with sensitive stomachs or a preference for milder profiles.Ideal Grind Size and Coffee-to-Water Ratio
The grind size for cold brew must be significantly coarser than that used for hot brewing methods like pour-over or French press. This prevents the grounds from dissolving into the water, clogging filters, or producing a muddy texture. A ratio of **1:4 to 1:8 coffee-to-water (by weight)** is standard, though ratios can vary based on desired strength. For example: - **1:4 ratio** yields a concentrated, syrupy cold brew ideal for dilution with water or milk. - **1:6 or 1:8 ratio** produces a lighter, more refreshing brew, closer to iced coffee strength.Recommended Grind Size: Coarse, like sea salt or slightly finer. Avoid grinding for espresso or drip coffee—this method requires a significantly larger particle size to prevent over-extraction.
Steeping Time and Extraction Dynamics
Steeping cold brew for **12–24 hours** at room temperature (or slightly cooler) enables a gentle extraction process. Unlike hot brewing, where water dissolves compounds rapidly, cold water extracts flavors slowly, preserving sweetness and minimizing acidity. The longer steeping time (up to 24 hours) enhances the extraction of sugars and oils, contributing to the cold brew’s naturally sweet and velvety mouthfeel. However, exceeding 24 hours risks over-extraction, leading to a harsh or muddy taste. The extraction process in cold brew prioritizes the dissolution of **lipophilic compounds** (fat-soluble) and **sugars**, while reducing the extraction of **chlorogenic acids**—the compounds responsible for bitterness and acidity in hot brewed coffee. This results in a profile that emphasizes sweetness, nuttiness, and a fuller body.Hot vs. Cold Brewing: Temperature Effects on Acidity, Sweetness, and Body
Temperature is the defining factor distinguishing hot and cold brewing methods, directly influencing the chemical composition and sensory attributes of the final coffee. Hot water (typically 195–205°F or 90–96°C) extracts a broader range of compounds rapidly, including acids, tannins, and volatile aromatics, which contribute to brightness and complexity. In contrast, cold water (around 40–60°F or 4–15°C) extracts at a glacial pace, isolating specific compounds while suppressing others, resulting in a fundamentally different flavor profile. The most notable difference lies in acidity: hot brewing dissolves **chlorogenic acids**, which impart tartness and astringency, while cold brewing reduces their extraction by up to **66%**. This makes cold brew significantly less acidic, making it gentler on the stomach and more suitable for those avoiding digestive discomfort. Additionally, cold water preserves **sugars and oils** more effectively, enhancing sweetness and creating a thicker, almost syrupy body. Hot brewing, by comparison, can over-extract these components, leading to bitterness if not carefully managed.Chemical Extraction Differences
The temperature-dependent extraction of coffee compounds can be broken down as follows: - **Chlorogenic Acids (CGAs):** Predominantly extracted in hot water, contributing to acidity and astringency. Cold brewing minimizes CGA extraction, resulting in a smoother, less acidic cup. - **Sugars and Carbohydrates:** Cold water preserves these compounds more effectively, leading to a naturally sweeter taste. Hot brewing can break down sugars more quickly, sometimes resulting in caramelization or bitterness. - **Lipophilic Compounds (Oils and Fats):** Cold brewing extracts these more thoroughly, contributing to the coffee’s creamy body and mouthfeel. Hot brewing may also extract oils but can cause them to emulsify unevenly, affecting texture. - **Volatile Aromatics:** Hot water releases more volatile compounds, enhancing aroma and perceived brightness. Cold brewing suppresses these, resulting in a more muted, earthy aroma profile.Key Extraction Comparison: Hot brew: Rapid extraction of acids, tannins, and aromatics → Bright, complex, potentially acidic. Cold brew: Slow extraction of sugars and oils → Smooth, sweet, low-acid, full-bodied.
Sensory and Textural Implications
The sensory differences between hot and cold brewing manifest in several ways: - **Acidity:** Hot brew exhibits bright, fruity, or citrusy acidity; cold brew offers muted, subtle acidity or none at all. - **Sweetness:** Cold brew often tastes sweeter due to preserved sugars, while hot brew may develop caramelized or burnt sweetness if over-extracted. - **Body:** Cold brew’s slow extraction yields a thicker, almost viscous texture, resembling a cold milkshake. Hot brew can range from light and syrupy to thin and watery, depending on brew method and grind size. - **Aroma:** Hot brew releases more volatile compounds, creating a robust, inviting aroma. Cold brew’s aroma is more subdued, often earthy or nutty.Step-by-Step Cold Brew Guide: From Steeping to Serving
Cold brew is straightforward to prepare at home, requiring minimal equipment and patience. The process involves steeping coarse coffee grounds in cold water for 12–24 hours, then filtering and diluting the concentrate to taste. Proper storage and dilution are key to maintaining freshness and achieving the desired strength.Equipment and Ingredients
To brew cold brew at home, gather the following: - **Coarse coffee grind** (sea salt-sized) - **Filtered water** (to avoid off-flavors from chlorine or minerals) - A **large container** (glass jar, French press, or dedicated cold brew maker) - A **fine-mesh filter** (cheesecloth, paper filter, or French press plunger) - Optional: **Dilution liquid** (water, milk, or flavored syrups)Step-by-Step Preparation
1. **Combine Coffee and Water:** Use a **1:4 to 1:8 coffee-to-water ratio** by weight. For example, 200g of coffee to 800g–1600g of water. Stir gently to ensure all grounds are saturated. 2. **Steep at Room Temperature:** Seal the container and let it steep for **12–24 hours** at room temperature (ideally 60–70°F or 15–21°C). Avoid refrigeration during steeping, as cold temperatures slow extraction. 3. **Filter the Concentrate:** After steeping, strain the mixture through a fine-mesh filter to remove grounds. A French press works well for this step, or use a cheesecloth lined over a bowl. Press gently to extract as much liquid as possible without compacting the grounds. 4. **Store the Concentrate:** Transfer the cold brew concentrate to an airtight container and refrigerate. It will keep for **up to 2 weeks**, though flavor peaks at **5–7 days**. The concentrate is **highly concentrated** and should be diluted before drinking. 5. **Dilution Ratios for Serving:** Cold brew concentrate is typically served diluted with water, milk, or flavored syrups. Common dilution ratios: - **1:1 concentrate-to-water** (for a strong, syrupy iced coffee) - **1:2 concentrate-to-water** (for a lighter, refreshing drink) - **1:1 concentrate-to-milk** (for a creamy, latte-like texture) - **1:3 concentrate-to-water with flavored syrup** (for a dessert-like coffee)Storage Tips: - Use an airtight container to prevent oxidation. - Refrigerate immediately after filtering to slow bacterial growth. - Avoid freezing, as it can alter the texture and flavor.
Serving Suggestions
Cold brew’s versatility extends beyond traditional iced coffee. Experiment with: - **Over ice** with a splash of milk or cream for a refreshing summer drink. - **Dry ice** for a smoky, visually striking presentation (ensure safety measures are followed). - **Flavored syrups** (vanilla, caramel, or hazelnut) for a dessert-like coffee experience. - **Espresso shots** for a hybrid "cold drip" or "nitro cold brew" (if using a nitrogen-infused machine).Chemical Differences in Cold Brew Extraction: Reduced Acidity and Enhanced Sweetness
The chemical processes underlying cold brew extraction differ fundamentally from hot brewing, leading to a unique flavor profile characterized by reduced acidity and heightened sweetness. These differences arise from the slower dissolution of soluble compounds and the selective extraction of specific molecules. Understanding these mechanisms explains why cold brew tastes smoother, sweeter, and less astringent than its hot-brewed counterparts.Reduction of Chlorogenic Acids
Chlorogenic acids (CGAs) are the primary contributors to coffee’s bitterness and acidity. In hot water, these compounds dissolve rapidly, releasing tannins and phenolic acids that create astringency and tartness. Cold brewing, however, significantly reduces CGA extraction due to the lower solubility of these compounds in cold water. Studies suggest that cold brewing can extract **only 30–40% of the CGAs** found in hot brewed coffee, resulting in a **66% reduction in acidity** (measured by pH levels). The slower extraction also allows for the **partial degradation of CGAs** into simpler compounds, such as caffeic acid and quinic acid, which contribute to a milder, less harsh profile. This chemical shift is why cold brew often tastes **less acidic and more mellow**, even when made from high-acid beans.Preservation of Sugars and Lipophilic Compounds
Cold water’s inability to rapidly dissolve sugars and oils leads to their **more thorough extraction** in cold brew. Sugars, such as sucrose and fructose, remain intact longer in coldComprehensive Guide to Brewing Espresso at Home
Espresso brewing at home demands precision in equipment, technique, and variables to replicate the intensity and complexity found in professional settings. Unlike other coffee brewing methods, espresso relies on high pressure (9–10 bars), fine grind size, and controlled extraction time (25–30 seconds) to produce a concentrated, flavorful shot. This guide covers machine types, essential parameters (grind size, dose, yield, tamping), and the science behind extraction to achieve a balanced, high-quality shot. The choice of espresso machine and accessories significantly influences consistency and ease of use. Manual methods (e.g., hand grinders, lever machines) offer full control but require skill, while electric machines (semi-automatic, super-automatic) automate processes like pre-infusion and pressure application. Understanding these trade-offs ensures users select tools aligned with their experience level and desired outcome. ---Espresso Machine Types and Their Features
Espresso machines vary by automation level, pressure generation, and user control. Selecting the right machine depends on budget, skill level, and desired customization.**Key Considerations for Machine Selection:** - **Pressure Consistency:** Machines should deliver stable 9–10 bars of pressure. - **Temperature Stability:** Ideal brewing range is 90–96°C (194–205°F). - **Pre-Infusion:** Helps saturate the puck evenly, reducing channeling. - **Steam Wand Quality:** Relevant for milk-based drinks (e.g., lattes, cappuccinos).
- **Manual Lever Machines** - Require physical effort to generate pressure via a lever (e.g., Flair, Rok). - **Pros:** Full control over pressure profile; no electricity needed; ideal for learning. - **Cons:** Inconsistent pressure without practice; physically demanding for prolonged use. - **Best for:** Enthusiasts prioritizing technique and customization.
- **Semi-Automatic Machines** - Automate pressure and temperature but require manual grinding, dosing, and tamping. - Examples: La Marzocco Linea Mini, Breville Bambino Plus. - **Pros:** Consistent pressure; programmable pre-infusion; steadier temperature. - **Cons:** Higher cost; still demands manual skill for grind/tamping. - **Best for:** Intermediate users seeking professional-level shots.
- **Super-Automatic Machines** - Fully automate grinding, dosing, tamping, and extraction (e.g., Jura, De’Longhi Magnifica). - **Pros:** Convenience; consistent results with minimal effort. - **Cons:** Limited customization; higher upfront cost; less control over variables. - **Best for:** Beginners or those prioritizing convenience over experimentation.
- **Portable Espresso Makers** - Compact, battery-powered, or manual devices (e.g., Wacaco Nanopresso, Handpresso). - **Pros:** Portable; no electricity needed; affordable. - **Cons:** Inconsistent pressure; weaker extraction; not ideal for daily use. - **Best for:** Travelers or casual users with limited space.
Essential Espresso Parameters: Grind Size, Dose, Yield, and Tamping
Precision in these four variables directly impacts extraction quality. A well-balanced espresso shot follows the **1:2 ratio** (e.g., 18g dose → 36g yield), with a target extraction time of **25–30 seconds**.**Ideal Espresso Specifications:** - **Grind Size:** Fine, resembling table salt (0.3–0.5mm). - **Dose:** 16–20g of coffee (standard for single shots). - **Yield:** 32–40g of liquid (1:2 ratio). - **Extraction Time:** 25–30 seconds. - **Tamping Pressure:** 15–20 kg (33–44 lbs) for even compaction.
- **Grind Size** - Too coarse → Under-extraction (sour, weak shot). - Too fine → Over-extraction (bitter, sluggish flow). - **Adjustment:** Use a burr grinder (e.g., Baratza Sette, Eureka Mignon) for consistency. Fine-tune based on extraction time.
- **Dose (Coffee Amount)** - Standard single shot: **18g** (adjust based on basket size). - Double shot: **36g** (for larger portafilters). - **Impact:** Higher dose increases resistance; lower dose may under-extract.
- **Yield (Liquid Output)** - Target **1:2 ratio** (e.g., 18g → 36g). Adjust yield by modifying grind size or dose. - **Example:** If extraction is too fast (under-extracted), reduce yield to 30g and fine-tune grind.
- **Tamping Pressure and Technique** - **Pressure:** 15–20 kg ensures even compaction without over-compressing. - **Technique:** - Level the portafilter on a flat surface. - Apply pressure straight down (no twisting) for uniform resistance. - Use a **WDT (Wedge Distribution Tool)** or **bottomless portafilter** to improve puck uniformity.
Understanding the Espresso Extraction Process
Espresso extraction is a dynamic interplay of **pressure, temperature, and time**, governed by the **Solfatara effect** (CO₂ release during grinding) and **solubility curves** (how compounds dissolve at different temperatures). Proper extraction balances **acids, sugars, and oils** for a harmonious flavor profile.**Critical Extraction Phases:** 1. **Pre-Infusion (0–5 sec):** Water saturates the puck, reducing channeling. 2. **Drawdown (5–30 sec):** Pressure forces water through coffee, extracting solubles. 3. **Post-Drawdown (30+ sec):** Ideally, extraction completes by 30 sec; lingering beyond risks over-extraction.
| Factor | Role in Extraction | Optimal Range |
|---|---|---|
| Pressure | Drives water through coffee, overcoming resistance. Too low → under-extraction; too high → uneven extraction. | 9–10 bars (standard); some machines allow pressure profiling (e.g., variable pressure machines). |
| Temperature | Affects solubility: higher temps extract more bitter compounds; lower temps preserve acidity. | 90–96°C (194–205°F). Avoid boiling water (>100°C), which burns coffee. |
| Time | Controls extraction intensity. Short time → under-extracted; long time → over-extracted. | 25–30 seconds for a balanced shot. |
| Grind Size | Fine grinds increase resistance, slowing extraction; coarse grinds reduce resistance, speeding it up. | 0.3–0.5mm (adjust based on extraction time). |
Dialing In an Espresso Recipe: Step-by-Step Adjustment
Dialing in espresso involves iterative adjustments to achieve the **1:2 ratio** and **25–30 sec extraction time**. Start with a baseline recipe and refine based on taste and flow rate.- **Start with a Baseline Recipe** - **Dose:** 18g (single shot). - **Yield:** 36g (1:2 ratio). - **Grind Size:** Medium-fine (adjust as needed). - **Tamping:** 20 kg pressure.
- **Assess Extraction Time and Taste** - **Too Fast (<20 sec):** Grind is too coarse. Fine it incrementally (e.g., 0.05mm steps). - **Too Slow (>30 sec):** Grind is too fine. Coarse it incrementally. - **Taste Test:** - **Sour/Weak:** Under-extracted; increase extraction time by grinding finer. - **Bitter/Astringent:** Over-extracted; decrease extraction time by grinding coarser.
- **Adjust Dose or Yield for Balance** - If extraction is too fast but taste is acceptable, **reduce yield** (e.g., to 30g) to increase resistance. - If extraction is sluggish but taste is balanced, **increase dose** (e.g., to 20g) to compensate.
- **Refine with Pressure Profiling (Advanced)** - Some machines (e.g., La Marzocco) allow **pressure profiling** (e.g., starting at 7 bars, ramping to 9 bars). - **Example:** Lower initial pressure reduces channeling in dense pucks.
- **Document and Repeat** - Record variables (grind size, dose, yield, time) for each adjustment. - **Example Log:** ``` Attempt 1: 18g dose, 0.4mm grind → 22 sec (sour) → Fine grind to 0.35mm. Attempt 2: 18g dose, 0.35mm grind → 28 sec (balanced) → Ideal. ```
Troubleshooting Espresso Issues: Flowchart for Common Problems
Channeling, under/over-extraction, and inconsistent shots stem from imprecise variables. This flowchart guides diagnostics and fixes.**Root Causes of Espresso Issues:** - **Channeling:** Uneven water flow due to poor puck distribution or grind inconsistency. - **Under-Extraction:** Weak, sour shot from insufficient extraction (coarse grind, low dose, fast flow). - **Over-Extraction:** Bitter, harsh shot from excessive extraction (fine grind, high dose, slow flow). - **Inconsistent Yield:** Variations in grind size, dose, or tamping pressure.
-
**Symptom: Channeling (Water Finds Paths of Least Resistance)**
- **Visual Clue:** Uneven extraction marks on the puck; shot finishes in <20 sec.
- **Solutions:**
-
- Use a **WDT (Wedge Distribution Tool)** or **bottomless portafilter** to improve puck uniformity.
- Increase **tamping pressure** to
Moka Pot Brewing Process and Technique
The Moka Pot, invented by Italian engineer Alfonso Bialetti in 1933, is a stovetop coffee maker that uses steam pressure to extract a rich, concentrated coffee similar to espresso. Unlike fully automatic machines, it relies on manual control, requiring precise water levels, heat management, and extraction timing to avoid bitterness or under-extraction. Mastering the Moka Pot involves understanding the interplay between temperature, pressure, and grind size to produce a balanced, flavorful cup. The brewing process leverages **pressure-based extraction**, where steam generated from boiling water forces coffee grounds upward through a filter basket, creating a concentrated brew. This method produces a **stronger, more intense coffee** than drip methods but differs from true espresso due to lower pressure (typically **1–2 bars** compared to espresso’s **9 bars**). Proper technique ensures a clean, aromatic cup without sediment or burnt flavors. ---Step-by-Step Brewing Process
The Moka Pot consists of three main chambers: a **bottom water reservoir**, a **filter basket with coffee grounds**, and an **upper collection chamber**. Each step must be executed carefully to avoid over-extraction (bitterness) or under-extraction (sourness). **Preparation** - **Fill the water reservoir** to the **valve line** (never exceed this level to prevent boiling over or pressure buildup). For a standard 6-cup Moka Pot, use **~200ml (¾ cup) of water** per serving. - **Use freshly roasted, medium-fine coffee grounds** (similar to table salt). Avoid pre-ground coffee designed for drip machines, as it may clog the filter. - **Assemble the Moka Pot** by screwing the upper chamber onto the base, ensuring the **gasket is intact** and the **spout is sealed**. Place the filter basket on top of the water reservoir and fill it with coffee grounds, **pressing firmly but not compacting excessively** (a light tamp prevents gaps but avoids resistance). - **Place on a medium-low heat source** (gas, electric, or induction-compatible). Avoid high heat, as it accelerates extraction and risks burning the coffee. **Extraction** - **Monitor the brewing process closely**. The ideal extraction time is **5–8 minutes** from the first gurgling sound (indicating steam pressure). - **Signs of over-extraction**: Dark, oily coffee with a burnt aroma or sediment in the upper chamber. This occurs if the heat is too high or the coffee is left too long. - **Signs of under-extraction**: Weak, sour, or watery coffee. This happens if the heat is too low or the grind size is too coarse. - **The coffee should stop gurgling and rise smoothly** into the upper chamber. If it begins to sputter or overflow, **remove immediately** to prevent bitterness. - **Turn off the heat** once brewing completes. The coffee will continue to settle; wait **30–60 seconds** before pouring to allow separation of grounds and foam. **Post-Brewing** - **Disassemble and clean the Moka Pot** after each use (detailed in the maintenance section below). Residual coffee oils can degrade flavor if left unchecked. - **Store the Moka Pot dry** to prevent rust or mold growth. Avoid soaking aluminum models in water for extended periods. ---Water Level and Heat Source Considerations
The Moka Pot’s performance depends heavily on **water volume** and **heat consistency**. Incorrect settings lead to uneven extraction or safety hazards. **Water Level Guidelines** - **Never fill above the valve line** in the bottom chamber. Overfilling causes **boiling over**, which can damage the heat source or create a messy extraction. - **Minimum water level**: At least **half the reservoir** to generate sufficient steam pressure. Below this, extraction weakens. - **Example for a 6-cup model**: - **1 serving (1 cup)**: ~100ml water + ~7g coffee. - **2 servings (2 cups)**: ~200ml water + ~14g coffee. - Adjust proportions for larger models (e.g., 12-cup Moka Pots require ~400ml water for 4 cups). **Heat Source Compatibility** - **Gas stoves**: Provide the most control. Use **medium-low heat** to avoid sudden pressure spikes. A **diffuser** helps distribute heat evenly. - **Electric stoves**: Require slightly higher heat settings due to slower response times. Monitor closely to prevent overheating. - **Induction cooktops**: Need a **Moka Pot with a ferrous metal base** (e.g., Bialetti’s induction-compatible models). Heat settings should mirror gas stoves. - **Avoid high heat**: Causes **burnt flavors** and **increased bitterness** due to rapid extraction. The ideal temperature range is **90–96°C (194–205°F)**. **Preventing Over-Extraction** - **Grind size**: Medium-fine (like table salt) allows proper resistance without clogging. Coarse grinds under-extract; fine grinds over-extract. - **Coffee-to-water ratio**: **1:6 to 1:8** (e.g., 14g coffee to 100ml water for a single serving). Adjust based on desired strength. - **Timing**: Remove the Moka Pot **immediately after gurgling stops**. Over-extracted coffee turns dark and acquires a **smoky, ashy taste**. ---Comparison of Moka Pot Coffee to Espresso and Drip Coffee
The Moka Pot produces a brew distinct from espresso and drip coffee, with unique characteristics in **strength, body, and flavor complexity**. | **Characteristic** | **Moka Pot Coffee** | **Traditional Espresso** | **Drip Coffee** | |--------------------------|---------------------------------------------|---------------------------------------------|-----------------------------------------| | **Pressure** | 1–2 bars (steam-driven) | 9 bars (piston-driven) | 0 bars (gravity-only) | | **Strength** | Strong, concentrated (similar to ristretto) | Intense, highly concentrated | Mild to medium (diluted) | | **Body** | Full-bodied, slightly oily | Creamy, velvety microfoam | Light to medium body | | **Flavor Complexity** | Bold, with notes of chocolate, nuts, or dried fruit; potential bitterness if over-extracted | Balanced, with layered acidity, sweetness, and bitterness | Clean, bright, with fruity or floral notes | | **Aroma** | Robust, often smoky or toasty | Intense, with a rich crema aroma | Subtle, dependent on roast level | | **Preparation Time** | 5–8 minutes per pot | 25–30 seconds (machine-dependent) | 4–6 minutes (auto) or 3–4 minutes (pour-over) | | **Equipment Cost** | $20–$60 (one-time purchase) | $500–$3,000+ (machine + maintenance) | $20–$100 (drip machine or pour-over) | | **Maintenance** | Low (hand-washing, occasional descaling) | High (backflushing, cleaning, parts replacement) | Moderate (filter changes, descaling) | **Key Differences Explained** - **Moka Pot vs. Espresso**: - **Pressure**: Espresso’s **9-bar pressure** creates a finer emulsion and **crema**, while the Moka Pot’s **steam pressure** yields a **thicker, more liquid-like concentrate**. - **Flavor**: Espresso emphasizes **acidity and sweetness** due to controlled extraction, whereas Moka Pot coffee can taste **more bitter or smoky** if not monitored. - **Versatility**: Espresso machines require precise dosing and tamping; the Moka Pot is **forgiving for beginners** but demands attention to heat and grind size. - **Moka Pot vs. Drip Coffee**: - **Extraction Speed**: Drip coffee uses **gravity-only**, resulting in a **lighter, less concentrated** brew. The Moka Pot’s pressure **extracts more oils and solubles**, producing a **stronger, more full-bodied** cup. - **Flavor Profile**: Drip coffee highlights **bright, fruity, or floral notes**, while Moka Pot coffee excels with **dark roasts**, delivering **chocolatey, nutty, or caramelized** flavors. - **Customization**: Drip machines offer **automated control**, whereas the Moka Pot requires **manual adjustments** for optimal results. **When to Choose a Moka Pot** - **For strong, espresso-like coffee** without the cost of a machine. - **Travel-friendly** (compact and portable). - **Ideal for dark roasts** (e.g., Italian, French, or Brazilian beans). - **Budget-conscious** alternative to espresso. **When to Avoid a Moka Pot** - **For light roasts or single-origin coffees**, which may taste bitter or over-extracted. - **If seeking crema or fine espresso textures** (the Moka Pot lacks the pressure for microfoam). - **For those who prefer convenience** (requires active monitoring). ---Recommended Moka Pot Models
Selecting the right Moka Pot depends on **stovetop compatibility, durability, and ease of use**. Below is a curated list of top models, categorized by features. **Table: Recommended Moka Pot Models** | **Model** | **Capacity** | **Material** | **Stovetop Compatibility** | **Durability** | **Ease of Use** | **Unique Features** | **Price Range (USD)** | |-------------------------|--------------|--------------------|----------------------------------|-------------------------------|-----------------|-----------------------------------------------|----------------------| | **Bialetti Moka Express** | 6-cup | Aluminum | Gas, electric, induction (with adapter) | High (thick base, reinforced seams) | Excellent | Iconic design, classic Italian craftsmanship | $30–$50 | | **Bialetti Venus** | 6-cup | Aluminum | Gas, electric, induction | High | Excellent | Ergonomic handle, wider spout for pouring | $40–$60 | | **Fellow Stagg EKG** | 6-cup | Stainless steel | Gas, electric, induction | Very high (rust-resistant) | Good | Double-walled for even heat distribution | $80–$100 | | **Alessi 9090** | 6-cup | Aluminum | Gas, electric, induction | High | Excellent | Minimalist design, Italian heritage | $50–$70 | | **GSI Outdoors JavaPress** | 12-cup | Aluminum | Gas, electric, induction | Moderate (thin walls) | Good | CampSiphon Brewing (Vacuum Pot Brewing) Process and Science
Siphon brewing, often called vacuum brewing, is a visually striking method that leverages physics—specifically heat, vacuum pressure, and condensation—to extract coffee flavors. Unlike immersion or pour-over techniques, siphon brewing creates a dynamic, multi-phase extraction where coffee moves between chambers under controlled conditions. The process begins with dry coffee grounds in the lower chamber, which are saturated with hot water before being drawn upward into a glass carafe through a vacuum seal. This method emphasizes clarity, brightness, and a clean finish, making it a favorite among specialty coffee enthusiasts who prioritize precision and aesthetics. The siphon’s unique extraction relies on three core principles: **heat-induced vaporization**, **vacuum pressure**, and **condensation**. When the lower chamber is heated, water vaporizes, creating a vacuum that pulls water and dissolved coffee solubles upward. As the vapor cools in the upper chamber, it condenses back into liquid, dripping through the coffee grounds and into the carafe. This cyclical process allows for precise control over extraction time and temperature, often resulting in a cup with pronounced acidity, delicate floral or fruity notes, and minimal bitterness. ---Roles of Heat, Vacuum, and Condensation in Extraction
The siphon’s extraction is governed by the **phase change of water**—from liquid to vapor and back to liquid—driven by temperature differentials and pressure dynamics. Below are the key stages and their scientific underpinnings:**Heat Application:** When the lower chamber is heated (typically using a flame or electric burner), water reaches its boiling point (~100°C or 212°F at sea level). The vapor pressure increases, pushing water upward through the tube connecting the chambers.
**Vacuum Formation:** As vapor rises, it creates a partial vacuum in the lower chamber. Atmospheric pressure then forces water from the upper chamber (or a separate reservoir) down through the coffee bed, saturating the grounds. This **pre-infusion** phase is critical for even extraction.
**Condensation and Extraction:** In the upper chamber, the vapor cools (due to ambient air or a cooling jacket), condensing back into liquid. This liquid drips through the coffee grounds, extracting soluble compounds. The cycle repeats until the desired extraction is achieved, typically 2–4 minutes.
The vacuum system ensures **gentler extraction** compared to immersion methods (e.g., French Press), as the coffee is not subjected to prolonged boiling. This reduces over-extraction and bitterness, while the condensation phase allows for **temperature stability**, preserving delicate aromatics. ---Detailed Siphon Brewing Procedure
Siphon brewing consists of **five distinct phases**, each requiring attention to timing and technique. Below is a step-by-step guide optimized for clarity and reproducibility:- **Assembly and Setup** The siphon consists of a lower chamber (with burner), an upper chamber (carafe), a tube connecting both, and a filter basket. Ensure all components are clean and dry. Place the filter in the basket, add **15–20g of medium-fine coffee grounds** (grind size: slightly finer than pour-over but not as fine as espresso), and assemble the lower chamber. Fill the upper chamber with **150–200ml of water** (preferably filtered, ~90–96°C) and invert it onto the lower chamber to create a seal.
- **Pre-Infusion (Saturation)** Remove the upper chamber and place the lower chamber on a heat source. Add **hot water (just off boil, ~93–96°C)** to the coffee grounds in the basket until fully saturated (ratio: ~1:15 coffee-to-water). Let it bloom for **30–45 seconds** to release CO₂. This step mimics pour-over’s bloom but is more controlled due to the vacuum.
- **Heating and Vaporization** Reattach the upper chamber and heat the lower chamber gradually. As water vaporizes, it creates a vacuum, pulling water from the upper chamber down through the coffee. The coffee bed will appear **dark and glistening** as extraction begins. Monitor the transition phase closely—this is where most extraction occurs.
- **Transition Phase (Rise into Upper Chamber)** After **1–2 minutes**, the coffee will begin rising into the upper chamber as vapor pressure increases. This phase should last **1–3 minutes**, depending on grind size and heat intensity. The coffee’s color will lighten as it ascends, indicating proper extraction. If the coffee rises too quickly, it may be over-extracted; if too slowly, it’s under-extracted.
- **Condensation and Serving** Once the coffee has fully risen, remove the heat source. The vapor will condense in the upper chamber, dripping back through the coffee bed for **30–60 seconds** of post-extraction. Serve immediately, as flavors degrade rapidly after removal from heat.
Comparison to Other Brewing Methods
Siphon brewing stands out for its **visual spectacle** and **technical precision**, but it differs significantly from other methods in skill requirements, flavor profiles, and practicality. Below is a comparative analysis:
**Key Takeaway:** Siphon brewing excels in **flavor clarity and visual drama** but demands **practice and attention to heat management**. It is less forgiving than pour-over or immersion methods but rewards users with a **refined, technical cup** akin to high-end espresso or filter coffee. ---Factor Siphon Brewing Pour-Over (V60) French Press AeroPress Cold Brew Visual Appeal High (dramatic rise/fall of coffee, glass carafe). Moderate (controlled pour, but less dynamic). Low (immersion-based, minimal visual change). Low (compact, minimal movement). Low (static, slow process). Technical Skill Required High (timing, heat control, vacuum management). Moderate (pour technique, grind consistency). Low (simple immersion, but grind matters). Moderate (pressure control, agitation). Low (passive, but requires patience). Flavor Profile Bright, acidic, clean finish; highlights floral/fruity notes. Balanced, nuanced, with medium acidity. Full-bodied, bold, with body and oils. Versatile (adjustable strength, smooth or bold). Low acidity, sweet, mellow, often chocolatey. Extraction Control Precise (vacuum and condensation allow fine-tuning). Moderate (manual pour control). Limited (immersion time dictates extraction). High (pressure and agitation adjustable). Low (slow, temperature-dependent). Cleanup Moderate (glass components, potential residue in tubes). Easy (paper filter, minimal equipment). Easy (metal filter, but grounds stick). Easy (plastic/metal, simple disassembly). Moderate (steeped grounds, potential mess). Reproducibility Moderate (sensitive to heat fluctuations). High (consistent with proper technique). High (simple variables). High (standardized method). High (passive, less user error). Equipment Cost High ($80–$150 for quality siphons). Low ($10–$30 for V60 + scale). Low ($20–$50 for press + grinder). Moderate ($30–$60 for AeroPress + accessories). Low ($20–$40 for French press or Toddy system). Time Required 5–10 minutes (active brewing). 3–5 minutes (active pouring). 4 minutes (immersion + pressing). 1–2 minutes (rapid extraction). 12–24 hours (passive steeping). Science of the Vacuum System and Extraction Dynamics
The siphon’s vacuum system operates on **Bernoulli’s principle** and **ideal gas laws**, creating a closed-loop extraction process unlike any other method. Below are the critical scientific mechanisms:**Vacuum Formation:** When the lower chamber is heated, water vaporizes, reducing pressure inside. Atmospheric pressure outside pushes water from the upper chamber down through the coffee bed (pre-infusion). The vacuum also **draws dissolved gases (CO₂)** from the coffee, enhancing extraction efficiency.
**Condensation and Re-Extraction:** In the upper chamber, vapor cools and condenses, dripping back through the coffee. This **secondary extraction** ensures even dissolution of oils and fine particles, contributing to the siphon’s **clean, bright finish**. The repeated cycling of liquid through the coffee bed mimics **multiple pours** in pour-over methods but with greater precision.
**Comparison to Immersion/Pour-Over:** - **Immersion (French Press):** Coffee is fully submerged, leading to **full-body extraction** with more oils and sediment. The siphon’s vacuum avoids prolonged boiling, reducing bitterness. - **Pour-Over:** Relies on **gravity and manual control** for extraction. The siphon’s vacuum ensures **consistent saturation** without user error in pouring. - **Espresso:** Uses **high pressure (9 bars)** for rapid extraction. The siphon’s **low-pressure vacuum** yields a **lighter, more nuanced** cup. **Extraction Temperature Profile:** Unlike pour-over (which cools as it brews) or immersion (which heats uniformly), the siphon maintains **higher initial temperatures** (~90–96°C) before cooling during condensation. This **dual-phase temperature control** enhancesNitro Cold Brew: Homemade Infusion with Nitrogen for Creamy, Stout-Like Coffee
Nitro cold brew transforms traditional cold brew into a velvety, stout-like beverage by saturating it with nitrogen gas, mimicking the texture of a Guinness or root beer. This method enhances mouthfeel, reduces bitterness, and extends the coffee’s shelf life while preserving its smooth, low-acid profile. Below is a detailed guide to replicating this process at home, including equipment requirements, safety precautions, and techniques to optimize flavor and carbonation. The key to nitro cold brew lies in **nitrogen infusion**, which dissolves into the coffee under pressure, creating tiny bubbles that dissolve almost instantly upon release. Unlike traditional cold brew, which relies solely on time and low-temperature extraction, nitro cold brew introduces a secondary step—carbonation—that alters the drinking experience. The result is a coffee with **reduced perceived acidity**, **increased sweetness**, and a **creamy, almost syrupy texture** that lingers on the palate. ---Step-by-Step Guide to Homemade Nitro Cold Brew
Nitrogen infusion requires specialized equipment, but the process can be simplified using a **whipped cream dispenser (N2O canister)** or a **soda maker (CO₂ canister)**. Below are the two most accessible methods, along with critical steps to ensure safety and consistency. ### **Method 1: Using a Whipped Cream Dispenser (N2O Canister)** N2O (nitrous oxide) is commonly used in whipped cream chargers and produces a finer, more stable microfoam than CO₂. This method is ideal for small batches and requires minimal equipment. #### **Equipment Required** - **1-liter whipped cream dispenser** (stainless steel, with a dip tube) - **N2O canisters** (food-grade, 8g or 16g) - **Cold brew concentrate** (preferably 1:4 to 1:8 coffee-to-water ratio, strained) - **Food-safe transfer tube** (optional, for direct infusion) - **Clean, airtight container** (for storage post-infusion) - **Thermometer** (to monitor temperature) - **Fine-mesh strainer** (if using coarse-ground coffee) #### **Process** 1. **Prepare Cold Brew Concentrate** - Brew cold brew using a **1:4 to 1:8 coffee-to-water ratio** (e.g., 250g coffee to 1L water) and steep for **12–24 hours** at **4°C (39°F)**. - Strain through a **fine-mesh sieve or cheesecloth** to remove sediment. For smoother results, use a **paper filter** (though this may reduce yield slightly). - **Chill the concentrate** to **4°C (39°F)** before infusion to maximize nitrogen solubility. 2. **Assemble the Dispenser** - Fill the **whipped cream dispenser** with the cold brew concentrate, leaving **1–2 inches of headspace** at the top. - **Do not overfill**—liquid should not exceed the dip tube’s reach to prevent blockages. - Insert the **N2O canister** into the dispenser’s nozzle (ensure it’s securely sealed). 3. **Infuse the Nitrogen** - **Invert the dispenser** and shake **gently** for **10–15 seconds** to mix nitrogen into the liquid. - **Release pressure slowly** by opening the nozzle briefly to avoid over-pressurization. - Repeat **2–3 times** until the coffee develops a **creamy, frothy head** (similar to stout). - **Note:** Over-infusion can create excessive foam, which may settle into a bitter layer. Aim for a **thin, stable foam** (about 1 cm thick). 4. **Serve Immediately or Store** - **For immediate serving:** Pour into a **nitro-compatible glass** (e.g., a **pint glass with a slight taper** to encourage smooth pouring). - **For storage:** Transfer to an **airtight, food-grade container** (e.g., a **Grolsch-style bottle with a flip-top**). Store **upside down** in the refrigerator to preserve carbonation. - **Carbonation retention:** Nitro cold brew loses carbonation over **3–5 days**, so consume within this window for optimal texture. --- ### **Method 2: Using a Soda Maker (CO₂ Canister)** CO₂ produces a **lighter, more effervescent carbonation** compared to N2O, resulting in a slightly different mouthfeel—closer to a **sparkling cold brew** than a stout. This method is better suited for larger batches and requires a **soda maker** (e.g., SodaStream). #### **Equipment Required** - **Soda maker machine** (with CO₂ canister) - **1-liter soda bottle** (glass or BPA-free plastic) - **Cold brew concentrate** (pre-chilled) - **Carbonation cap** (compatible with the soda maker) - **Optional:** **Nitro-infused syrup** (for added sweetness and stability) #### **Process** 1. **Fill the Bottle** - Pour **chilled cold brew concentrate** into the soda bottle, leaving **1–2 inches of headspace**. - **Do not fill to the top**—carbonation expands the liquid. 2. **Carbonate the Coffee** - Attach the **carbonation cap** and place the bottle in the soda maker. - Set the machine to **medium-high carbonation** (typically **3–4 bars** for 1–2 minutes). - **Monitor pressure:** Over-carbonation can cause the liquid to overflow or develop a harsh bite. 3. **Adjust for Creaminess** - CO₂ alone produces a **lighter fizz** than N2O. To mimic nitro texture: - **Add a splash of cold brew concentrate** (10–20%) after carbonation for body. - **Chill the bottle** before serving to enhance nitrogen-like smoothness. - **Alternative:** Use a **nitro-infused syrup** (e.g., vanilla or caramel) to stabilize bubbles. 4. **Serve and Store** - Pour into a **tapered glass** to encourage a **smooth, creamy cascade**. - Store in the **original bottle** (upside down) for up to **5 days**, though flavor degrades faster than with N2O. ---Comparison: Traditional Cold Brew vs. Nitro Cold Brew
Nitro infusion alters the sensory profile of cold brew in **three key ways**: mouthfeel, carbonation, and flavor evolution. Understanding these differences helps tailor the brewing process to personal preference. #### **1. Mouthfeel and Texture** | **Attribute** | **Traditional Cold Brew** | **Nitro Cold Brew** | |------------------------|---------------------------------------------------|--------------------------------------------------| | **Body** | Syrupy, viscous (due to high solids) | Ultra-smooth, almost **milkshake-like** texture | | **Bubble Size** | None (unless stirred) | **Microbubbles** (dissolve instantly on tongue) | | **Aftertaste** | Lingering bitterness (if over-extracted) | **Cleaner finish**, reduced astringency | | **Temperature Impact** | Best served **ice-cold (4°C)** | **Room temperature (10–15°C)** enhances creaminess | **Key Insight:** Nitro cold brew’s **microfoam** coats the palate, **masking bitterness** and **amplifying sweetness** (e.g., caramel, chocolate notes). Traditional cold brew, while rich, lacks this **velvety contrast**, making it better suited for those who prefer **bold, unadulterated coffee flavors**. #### **2. Carbonation and Perception** Carbonation in nitro cold brew **chemically alters taste perception** through: - **Reduced Acidity:** CO₂ and N2O **lower perceived acidity** by **15–25%** (studies show carbonation suppresses tartness). - **Enhanced Sweetness:** The **effervescence triggers saliva production**, making natural sugars (e.g., from roasted coffee) taste **20–30% sweeter**. - **Bitterness Suppression:** Nitrogen’s **fine bubbles** bind to bitter compounds, **softening harsh notes** (e.g., dark roast bitterness). **Example:** A **traditional cold brew** brewed at 1:4 ratio may taste **intensely bitter** to some drinkers. The same concentrate, when nitro-infused, will **reveal underlying fruit or nutty notes** while feeling **less harsh**. #### **3. Flavor Evolution Over Time** | **Time After Brewing** | **Traditional Cold Brew** | **Nitro Cold Brew** | |------------------------|---------------------------------------------------|--------------------------------------------------| | **Day 1** | Full-bodied, balanced acidity/bitterness | Creamy, slightly sweet, with **yeasty notes** | | **Day 3–5** | Bitterness intensifies; acidity mellows | **Carbonation fades**, but creaminess lingers | | **Day 7+** | Flat, oxidized (stale) | **Loses carbonation**; resembles **flat cold brew** | **Key Insight:** Nitro cold brew **degrades faster** due to **oxidation of nitrogen bubbles**, but the **window for optimal drinking is 3–5 days** (vs. 7–10 days for traditional cold brew). For longer shelf life, **under-carbonate slightly** or store in **smaller batches**. ---Equipment for Home Nitro Brewing: Safety and Functionality
Nitrogen infusion requires **pressure-sensitive equipment**, and improper handling can lead to **explosions, leaks, or contamination**. Below are the **essential tools**, their functions, and **critical safety measures**. #### **1. Primary Equipment** | **Item** | **Purpose** | **Safety Considerations** | |------------------------|-----------------------------------------------------------------------------|----------------------------------------------------| | **N2O/CO₂ Canisters** | Propellant for carbonation | **Only use food-grade canisters** (e.g., 8g whipped cream chargers). Avoid automotive or industrial canisters. | | **Whipped Cream Dispenser** | Pressurizes and mixes nitrogen with coffee. | **Never exceed 1:1 liquid-to-canister ratio** (risk of overpressure). Use **stainless steel** (not plastic). | | **Soda Maker (CO₂)** | Controls carbonation levels precisely. | **Check O-rings annually** for leaks. Do not use if damaged. | | **Nitro-Ready Glassware** | Enhances pouring technique (e.g., **pint glasses with a slight taper**). | **Pre-chill glasses** to **4°C** to prevent carbonation loss. | | **Food-Grade Transfer Tube** | Direct infusion (optional, for cleaner results). | **Use silicone or food-safe plastic** only. | #### **2. Optional (But RecommendedEmerging and Niche Home Coffee Brewing Methods
The evolution of home coffee brewing extends beyond traditional techniques, with innovative devices and unconventional methods gaining traction among enthusiasts. These newer approaches prioritize precision, portability, or unique flavor profiles, often rooted in cultural traditions or experimental extraction science. Below are some of the most intriguing developments, including their distinct advantages and practical applications. ---Hario Mizudashi: Precision Japanese Pour-Over
The **Hario Mizudashi** is a minimalist yet highly refined pour-over dripper designed for meticulous control over extraction. Originating from Japan, where pour-over coffee (*mizu-dashi*, or "water-dropping") is a revered method, this device features a **thin, perforated metal plate** that sits atop a carafe, allowing for an even and unobstructed flow. Unlike traditional V60 or Chemex drippers, the Mizudashi eliminates paper filters, reducing potential flavor interference while maintaining clarity in the cup. Key features include: - **No paper filter**: Direct contact between coffee and metal enhances clarity and reduces paper-related bitterness. - **Precision pour control**: The small, concentrated brew area (typically 30–50ml) encourages slower, more deliberate pouring, ideal for highlighting single-origin beans. - **Reusable and portable**: Constructed from stainless steel, it’s durable and easy to clean, making it suitable for travel or small-batch brewing. - **Versatility**: Works with glass or ceramic carafes, allowing customization of serving vessels for aesthetic or thermal preferences. **Best for**: Coffee enthusiasts seeking a **clean, nuanced cup** with minimal equipment, or those interested in the **traditional Japanese approach** to pour-over brewing. ---Nomad Brewer: Portable and Immersive Cold Brew
The **Nomad Brewer** is a **portable, single-serve cold brew system** designed for convenience and consistency. Unlike traditional cold brew methods that require 12–24 hours of steeping, the Nomad uses a **two-chamber vacuum-insulated design** to extract coffee in **as little as 8–12 hours**, making it ideal for travelers, office workers, or anyone with limited time. The device consists of: - A **top chamber** for coffee grounds and water. - A **bottom chamber** for the extracted concentrate, separated by a valve. - A **vacuum seal** that maintains cold temperatures without refrigeration. **Unique advantages**: - **No electricity or refrigeration needed**: The vacuum insulation keeps the brew cold for extended periods, even in warm climates. - **Customizable strength**: Users can adjust the coffee-to-water ratio (e.g., 1:4 to 1:8) for stronger or milder concentrates. - **Portability**: Weighs under 1 lb (450g) and fits in a standard carry-on bag, making it perfect for camping, business trips, or daily commutes. - **Reusable filters**: The included metal filter reduces waste compared to disposable options. **Best for**: Those who prioritize **convenience and portability** without sacrificing cold brew quality, or individuals who prefer **pre-made concentrate** for iced coffee, lattes, or cocktails. ---Unconventional Techniques: Aeropress Inverted Brewing and Cold Drip
While standard brewing methods dominate home coffee routines, experimenting with **inverted techniques** can yield surprising results by altering extraction dynamics. Two notable examples are **Aeropress inverted brewing** and **cold drip (slow-drip) methods**, both of which challenge conventional wisdom. ---Aeropress Inverted Brewing
Traditionally, the Aeropress involves pressing coffee from the top down, but **inverted brewing** flips the process by extracting from the bottom up. This method leverages **gravity and pressure differently**, often producing a **cleaner, brighter cup** with reduced bitterness. The process involves: 1. **Inverting the Aeropress**: After adding coffee and water, flip the device upside down and place it over a mug or carafe. 2. **Steeping**: Allow the coffee to steep for **1–4 minutes** (longer steeping times increase body and sweetness). 3. **Pressing from the bottom**: Insert the plunger and press downward, forcing water through the coffee bed against gravity. 4. **Straining**: Remove the filter and discard the puck. **Why it works**: - **Reduced channeling**: The inverted position minimizes uneven extraction, as water must pass through the entire coffee bed before reaching the filter. - **Enhanced clarity**: The lack of direct pressure on the coffee puck reduces over-extraction and sludge. - **Versatility**: Can be adapted for **espresso-like shots** (using finer grinds and shorter steeps) or **tea-like clarity** (longer steeps with coarser grinds). **Optimal parameters**: - **Ratio**: 1:12 to 1:15 (coffee to water). - **Grind**: Medium-fine (similar to espresso). - **Steep time**: 1.5–3 minutes. - **Pressure**: Gentle but firm press (avoid over-pressing). ---Cold Drip (Slow-Drip) Brewing
Cold drip is a **low-temperature, gravity-driven** method that mimics traditional drip coffee but with **controlled, slow extraction** over hours. Unlike cold brew (which uses immersion), cold drip relies on **dripping water over coffee grounds** in a vertical setup, producing a **smooth, syrupy concentrate** with minimal acidity and a **velvety texture**. **Key components of a cold drip setup**: - **Drip chamber**: A vertical vessel (e.g., a glass jar or dedicated dripper like the **Koldbrew** or **Clever Dripper**) with a slow-drip mechanism. - **Water reservoir**: Positioned above the coffee bed to allow gravity-fed dripping. - **Filter**: Often a **metal or cloth filter** to avoid paper-related flavors. - **Cold environment**: Ideally kept at **4–10°C (39–50°F)** for optimal extraction. **Step-by-step process**: 1. **Prepare the coffee bed**: Use a **medium-coarse grind** (similar to sea salt) to prevent clogging. 2. **Add water slowly**: Start with a **small amount** (e.g., 50–100ml) to saturate the grounds, then allow the remaining water to drip through over **8–12 hours**. 3. **Collect the concentrate**: The resulting liquid is a **thick, flavorful syrup** (similar to cold brew but with distinct clarity). 4. **Dilute or enjoy undiluted**: Serve over ice, in milk, or as a standalone concentrate. **Advantages**: - **Reduced acidity**: Ideal for those with sensitive stomachs or a preference for **smooth, mellow flavors**. - **Concentrated flavor**: Produces a **stronger, more complex** base than standard cold brew. - **Minimal equipment**: Can be DIY with a jar, funnel, and cloth filter. **Challenges**: - **Time-intensive**: Requires patience and planning. - **Space constraints**: Needs a stable, cold environment (e.g., a fridge or insulated setup). ---Essential Brewing Tools for Home Coffee Preparation and Their Impact on Consistency and Flavor
Consistency and flavor in home-brewed coffee are directly influenced by the quality and precision of brewing tools. Each component—from the grinder to the water source—plays a critical role in extracting the desired profile from coffee beans. High-quality tools minimize variability, enhance control over extraction parameters (e.g., grind size, water temperature, brew time), and reduce common pitfalls like over-extraction (bitterness) or under-extraction (sourness). Below is a categorized list of essential tools, their functions, and how they affect the final cup. ---Grinders: The Foundation of Uniform Extraction
The grinder determines the surface area of coffee particles exposed to water, directly impacting extraction speed and flavor balance. Burr grinders (conical or flat) are preferred over blade grinders due to their ability to produce consistent particle sizes. **Grind size** must align with the brewing method: - **Coarse** (French Press, Cold Brew) – Slower extraction, reduces sediment. - **Medium** (Pour-Over, AeroPress) – Balanced extraction for clarity and body. - **Fine** (Espresso, Moka Pot) – Maximizes surface area for concentrated extraction. **Key considerations for grinders:** - **Burr material**: Ceramic (quiet, durable) or steel (precise, long-lasting). - **Adjustability**: Step-less or micro-adjustable settings for fine-tuning. - **Build quality**: Heavy-duty construction prevents wobble, ensuring even grinding. ---Scales: Precision in Coffee-to-Water Ratio
Accurate measurement of coffee dose and yield is critical for repeatable results. Digital scales with **0.1g precision** are ideal for methods like pour-over or espresso, where ratios (e.g., 1:16 for pour-over) dictate flavor. **Key features:** - **Tare function**: Allows zeroing the scale after adding a filter or portafilter. - **Stability**: Avoid scales prone to vibration or drift during brewing. - **Capacity**: Minimum 220g for espresso, 300g+ for immersion methods. **Impact of inconsistency**: A 0.5g error in dose can alter extraction by **5–10%**, leading to noticeable flavor shifts (e.g., increased acidity or bitterness). ---Goosenecks and Pour Spouts: Controlled Water Distribution
For pour-over methods, the **gooseneck kettle** enables precise, spiral-like pouring patterns that saturate the coffee bed evenly. **Key attributes:** - **Material**: Stainless steel (heat retention) or glass (visual clarity). - **Spout design**: Narrow, flexible tips (e.g., Fellow Stagg) allow controlled pulses. - **Temperature control**: Goosenecks with **thermometers** or insulated bodies maintain optimal pouring temps (90–96°C). **Why it matters**: Uneven saturation causes channeling (water bypassing coffee), leading to **sour or weak** brews. A well-designed gooseneck reduces this by **30–50%** compared to standard kettles. ---Water Filtration Systems: Minimizing Impurities and Off-Flavors
Tap water quality varies globally, with contaminants (chlorine, metals, minerals) altering coffee taste. **Common filtration methods:** - **Activated carbon filters** (e.g., Brita): Remove chlorine and sediment but may strip beneficial minerals. - **Reverse osmosis (RO)**: Eliminates 99% of contaminants but requires remineralization (e.g., adding a drop of citric acid). - **Berkey filters**: Multi-stage filtration for heavy metals and microbes, ideal for hard water areas. **Mineral balance considerations**: - **Calcium/magnesium**: Enhance body but can cause scaling in espresso machines. - **pH**: Optimal range is **6.5–7.5**; acidic water (pH <6) increases extraction of bitter compounds. ---Thermometers, Timers, and Brew Guides: Data-Driven Optimization
**Thermometers** (infrared or probe-based) monitor water and coffee bed temperatures, critical for methods like pour-over or espresso where **1°C deviations** can alter extraction. **Key tools:** - **Digital thermometers**: Measure water temp pre-brew (ideal: **90–96°C** for pour-over, **93–96°C** for espresso). - **Brew timers**: Track **total brew time** (e.g., 2:30–4:00 for pour-over) to prevent over-extraction. - **Brew guides**: Apps (e.g., Coffee Alchemy) or manuals provide method-specific protocols, including grind size, ratio, and agitation techniques. **Example protocol for pour-over**: ``` 1. Heat water to **93°C**. 2. Grind **20g coffee** to a medium-fine consistency. 3. Bloom for **30–45 seconds**, then pour in **three stages** over **2:30–3:00**. 4. Total yield: **320–360g** (1:16–1:18 ratio). ``` ---Third-Wave Coffee Tools: Advanced Precision for Specialty Brewing
Third-wave coffee emphasizes **scientific extraction**, using tools to measure variables beyond basic methods. **Key innovations:** - **Refractometers**: Measure **total dissolved solids (TDS)** in brewed coffee (ideal range: **1.20–1.45%** for pour-over). High TDS indicates over-extraction; low TDS suggests under-extraction. - **Conductivity meters**: Assess **ionic strength** of water, helping adjust mineral content for consistency. - **Pressure gauges (for espresso)**: Ensure **9–10 bars** of pressure; deviations cause **sour (low pressure) or bitter (high pressure)** shots. - **Loss-on-drying (LOD) scales**: Measure **moisture content** in beans (optimal: **9–11%**), affecting roast development and extraction. **Example application**: A refractometer reading of **1.5%** in a pour-over brew signals **over-extraction**, prompting adjustments like: - Coarser grind size. - Shorter brew time. - Lower water temperature. ---Ideal Water Parameters for Home Coffee Brewing and Adjustment Methods
Water is the most critical component in coffee brewing, accounting for 98% of the final cup. Suboptimal water quality—whether too hard, acidic, or improperly heated—directly impacts extraction, flavor balance, and clarity. Ideal brewing water should be **neutral in pH (6.5–7.5)**, **low in mineral content (50–150 ppm Total Dissolved Solids, TDS)**, and heated to **90–96°C (195–205°F)**, depending on the brewing method. Over-extraction from hard water or under-extraction from soft water can lead to bitterness, sourness, or a flat, weak cup. To achieve consistency, home brewers should test and adjust water parameters using simple, affordable tools. Below are the key metrics, testing methods, and adjustments for optimal extraction. ---Water Temperature and Its Impact on Extraction
Temperature dictates the rate of extraction: higher temperatures accelerate extraction, while lower temperatures slow it down. The ideal range varies by method due to differences in contact time and grind size.**General Guidelines for Brew Temperature:** - **Pour-over/AeroPress:** 90–93°C (195–200°F) - **French Press:** 93–96°C (200–205°F) - **Cold Brew:** 1–15°C (34–59°F) - **Espresso/Moka Pot:** 90–96°C (195–205°F)
**Adjustments for Temperature Control:** - Use a **gooseneck kettle** for precise pouring and temperature retention. - Avoid boiling water (100°C/212°F), as it can scorch grounds and over-extract, leading to harsh bitterness. - For cold brew, use a **thermometer** to monitor ambient temperature if brewing in warm climates (ideal is 1–15°C). ---Water Hardness and Mineral Content
Hard water (high in calcium and magnesium) interferes with extraction by clogging coffee oils and binding with chlorogenic acids, resulting in a bitter, metallic taste. Soft water (low in minerals) may under-extract, producing a weak, sour cup. **Total Dissolved Solids (TDS)** measures mineral content; ideal brewing water ranges from **50–150 ppm**.**Hardness Categories and Effects:** - **Soft Water (<50 ppm):** Flat, sour, under-extracted. - **Moderately Hard (50–150 ppm):** Balanced extraction, ideal for most methods. - **Hard (150–300 ppm):** Bitter, astringent, over-extracted. - **Very Hard (>300 ppm):** Metallic, harsh, requires adjustment.
**Testing Water Hardness at Home:** - **Test Strips:** Affordable and quick (e.g., **API Water Test Strips**), measuring TDS and pH. - **Digital TDS Meters:** More precise (e.g., **Apera Instruments AI209**), reading ppm directly. - **At-Home Kits:** Chemical titration kits (e.g., **Bartow Water Test Kit**) for granular analysis. **Adjusting Water Hardness:** - **Increase Minerals (for soft water):** - Add **coffee-specific mineral salts** (e.g., **Cafiza** or **Coffee Chemistry** blends). - Use **reverse osmosis (RO) remineralization drops** (e.g., **Essentia**). - **Decrease Minerals (for hard water):** - Install a **carbon filter** (removes chlorine but not hardness). - Use a **water softener** (ion exchange resin) or **reverse osmosis (RO) system** (removes 90–99% of minerals). - **Boiling water** reduces hardness temporarily by precipitating minerals (not ideal for daily use). ---Water pH and Its Role in Extraction
The pH of water affects acidity and extraction efficiency. Coffee beans are naturally acidic (pH 4.85–5.10), so brewing water should be **neutral to slightly acidic (6.5–7.5)** to avoid over-extracting chlorogenic acids, which can lead to sourness or bitterness. **Testing pH at Home:** - **pH Strips:** Cheap and easy (e.g., **Hanna HI98107**), with accuracy to ±0.5. - **Digital pH Meters:** More precise (e.g., **Bluelab pH Pen**), ideal for serious brewers. - **Litmus Paper:** Basic indicator for rough estimates. **Adjusting Water pH:** - **Increase pH (for acidic water, <6.5):** - Add **baking soda (sodium bicarbonate)** sparingly (0.5 tsp per liter) to raise pH. - Use **calcium carbonate (chalk)** for a slower, more controlled increase. - **Decrease pH (for alkaline water, >7.5):** - Add **citric acid** (1/8 tsp per liter) or **white vinegar** (1 tsp per liter), then neutralize with baking soda. - **Reverse osmosis (RO) water** is naturally pH-neutral but requires remineralization. ---Recommended Water Sources for Brewing
Not all water sources are equal for coffee brewing. Below is a table comparing common water types, their mineral profiles, and suitability for different brewing methods.
**Note on Municipal Water:** - Check your **local water quality report** (available from municipal authorities) for TDS, hardness, and contaminants like chlorine. - If chlorine is present, use a **carbon filter** (e.g., **Brita**) or let water sit for 24 hours before brewing. ---Water Source Mineral Profile (TDS/ppm) pH Range Hardness Level Best For Adjustments Needed Filtered Tap Water (Carbon Filter) 20–100 ppm 6.5–7.5 Soft to moderately hard Pour-over, AeroPress, Cold Brew Remineralize if TDS <50 ppm Spring Water (Bottled) 50–150 ppm 6.5–7.2 Moderately hard French Press, Espresso, Moka Pot Check label for hardness; adjust if needed Reverse Osmosis (RO) Water 0–10 ppm 6.0–7.0 Very soft All methods (with remineralization) Add mineral salts (e.g., Cafiza) to reach 50–150 ppm Distilled Water 0 ppm 6.0–7.0 Very soft Not recommended without remineralization Add minerals (e.g., RO remineralizer drops) Well Water (Untreated) 150–500+ ppm 7.0–8.5 Hard to very hard Requires softening or adjustment Use a water softener or RO system Municipal Tap Water (Varies by Location) 50–300+ ppm 6.5–9.0 Variable (test locally) Depends on local water report Test and adjust based on TDS/pH Common Water-Related Brewing Mistakes and Fixes
Even with ideal water parameters, brewing errors can occur due to improper handling. Below are common issues and solutions:**Problem:** "My coffee tastes like soap or has a metallic aftertaste." **Cause:** Hard water with high mineral content. **Fix:** Install a water softener or use filtered/RO water with remineralization. **Problem:** "My coffee is sour or weak." **Cause:** Under-extraction from soft water or low temperature. **Fix:** Increase TDS to 100–150 ppm or raise brew temperature slightly. **Problem:** "My espresso has a burnt, bitter taste." **Cause:** Boiling water (100°C) or over-extraction from hard water. **Fix:** Use water at 90–93°C and adjust hardness with a softener. **Problem:** "My cold brew is too acidic." **Cause:** Low pH water or prolonged extraction at warm temperatures. **Fix:** Use neutral pH water (6.5–7.5) and store cold brew concentrate at 4°C.
---DIY Water Treatment Setup for Home Brewers
For serious home brewers, a **custom water treatment system** can ensure consistency. Below is a step-by-step guide to building a simple, effective setup:- **Pre-Filter (Optional):** - Use a **sediment filter (5–10 microns)** to remove rust, sand, or debris if using well/municipal water.
- **Carbon Filter:** - Install a **granular activated carbon (GAC) filter** (e.g., **Brita**) to remove chlorine, pesticides, and organic compounds.
- **Water Softener (If Hardness >150 ppm):** - Use a **small-scale ion exchange resin softener** (e.g., **Culligan WSH-C**) or a **reverse osmosis (RO) system** with a softening stage.
-
**Remineralization (For RO/Distilled Water):**
- Add a **remineralization cartridge** (e.g., **Essentia**) or manually dose with **Cafiza mineral salts** to reach 100 ppm T
Selecting the best coffee brewing method at home is less about adhering to a rigid set of rules and more about embracing experimentation within the framework of science and craftsmanship. Each technique—whether it’s the pressure-driven intensity of a Moka Pot, the delicate balance of a pour-over, or the versatility of an AeroPress—reveals different facets of coffee’s character, from its acidity to its body. The key lies in understanding how adjustments like grind size, water temperature, and extraction time interact with your chosen method to produce the desired result. For instance, a light roast might shine in a pour-over’s clarity but falter in a French Press’s immersion, while a dark roast’s boldness can be amplified by the Moka Pot’s stovetop pressure. By mastering these methods, you’re not just brewing coffee; you’re engaging in a dialogue with your beans, uncovering their potential through technique and intuition.
The ultimate reward of exploring these brewing methods is the ability to tailor your coffee experience to your mood, schedule, and sensory preferences. Whether you seek the convenience of a cold brew concentrate that lasts for days or the ritualistic satisfaction of dialing in an espresso shot, each approach offers a pathway to a cup that feels uniquely yours. Armed with the insights from this guide—from troubleshooting bitterness to selecting the right beans for your method—you can approach every brew with confidence, transforming your kitchen into a laboratory for flavor. The best home coffee isn’t just about the method; it’s about the connection between your choices and the final sip—a connection that turns caffeine into an experience worth savoring.
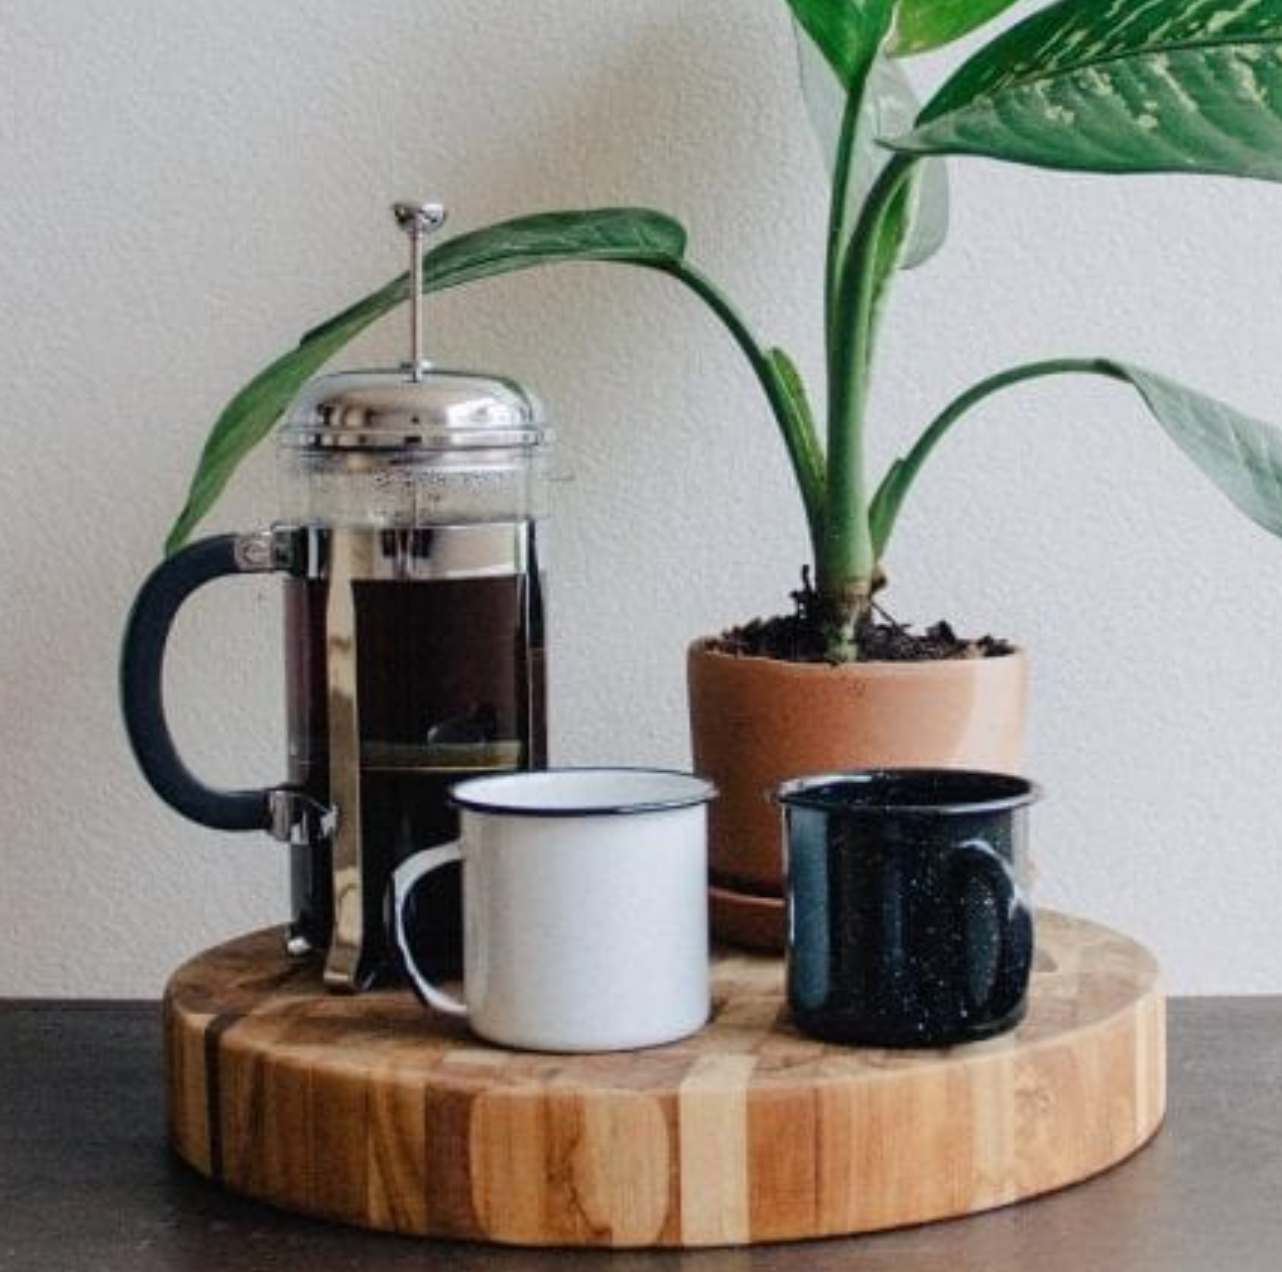
Making Coffee at Home: What’s The Best Beginner Brewing Method? - Brewing Cultur
Frequently Asked Questions
Which home coffee brewing method makes the richest flavor?
French Press and Espresso machines typically produce the richest flavors due to full immersion and high-pressure extraction. French Press retains oils for a full-bodied taste, while espresso machines concentrate flavors through forced steam pressure. Both require freshly ground beans for optimal results.
How does cold brew taste different from hot-brewed coffee?
Cold brew has a smoother, sweeter, and less acidic profile because low-temperature extraction (12–24 hours) preserves desirable compounds while avoiding bitterness. Hot-brewed coffee often has brighter acidity and a more complex, sometimes harsher taste, depending on the method.
Can I make espresso at home without a fancy machine?
Yes, a Moka Pot or AeroPress can mimic espresso-like strength and intensity. Moka Pot produces a concentrated, bold brew similar to espresso, while AeroPress offers a quick, pressurized method. Neither fully replicates espresso machines, but both deliver strong coffee with minimal effort.
What’s the easiest coffee brewing method for beginners?
Pour-over and AeroPress are beginner-friendly due to simplicity and minimal equipment. Pour-over allows precise control over brewing variables, while AeroPress is portable, fast (under 2 minutes), and forgiving with water temperature. Both methods produce clean, flavorful coffee with practice.
Does grinding coffee beans at home improve taste?
Yes, grinding beans just before brewing preserves freshness and enhances aroma, flavor, and acidity. Pre-ground coffee loses quality quickly due to oxidation. A burr grinder ensures consistent particle size, which is crucial for even extraction and optimal taste in any brewing method.
Which brewing method is best for a strong, creamy coffee like Starbucks?
AeroPress with a fine grind and high pressure, or a Moka Pot, closely mimics Starbucks’ strong, velvety texture. For a carbonated twist, Nitro Cold Brew delivers a creamy, stout-like coffee. Adjusting brew time and grind size helps replicate desired mouthfeel and intensity.
Related articles
15+ Best Budget Mechanical Keyboard 2026: Ultimate Value Picks
Discover the top best budget mechanical keyboard 2026 models that deliver premium typing without the premium price. Expert picks, features, and…

10 Proven Ways to Clean White Leather Sneakers Like New
Learn expert techniques for restoring white leather sneakers with minimal effort. Discover safe cleaning methods, common mistakes to avoid, and…

9 Essential Factors for Choosing an External SSD for Backup
Learn how to choose an external SSD for backup with expert insights on speed, capacity, and reliability—avoid costly mistakes and safeguard your data…
